Nobody decreed that October manicures require neon orange paint and fake blood. If you lean toward clean lines and quiet luxury, the holiday season often feels like a beauty roadblock. You might want festive nails, but your hands still need to look polished during early morning client meetings.
That balance is where white Halloween nails excel. Crisp alabaster coats, sheer milky bases, and glazed finishes turn spooky themes into modern art. Whether you prefer delicate line work or understated negative space, you can celebrate the holiday without giving up your clean aesthetic. You can also explore our favorite subtle Halloween nail ideas for more minimal designs.
These 17 white nail ideas show how to make ghostly nail art look sharp, wearable, and refined.
1. Milky white ghost French tips
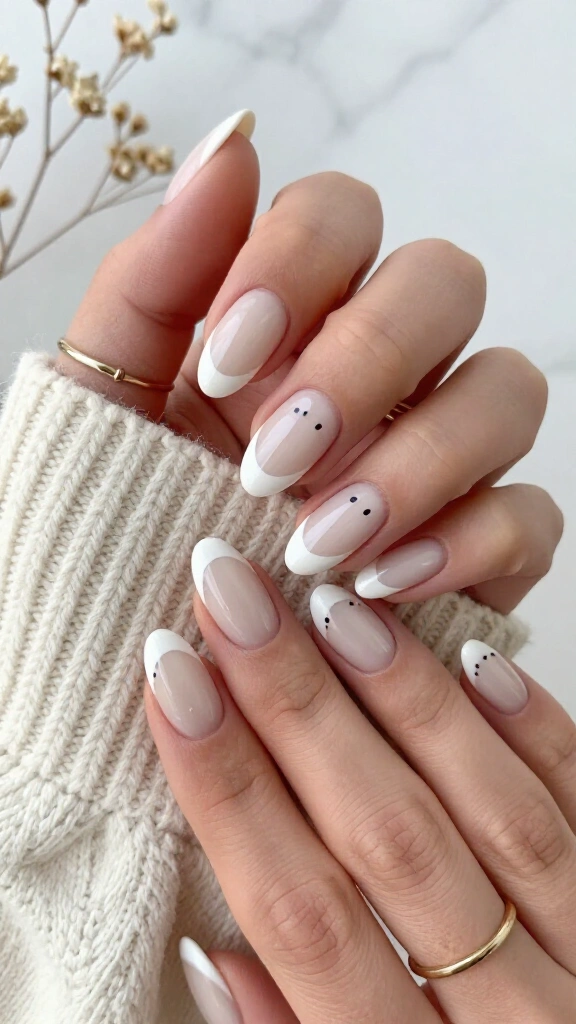
Reinvent the classic French manicure by turning your smile lines into floating apparitions. Start with a semi-sheer, milky nude base coat that flatters your natural nail bed. Next, paint soft, wavy white ghost silhouettes across the tips using a fine detail brush.
Dot two specks of jet-black gel on each tip for the eyes. The design stays airy and modern while adding a lighthearted touch to your hands. For more spirit-inspired art, browse these Halloween ghost nail designs.
2. Pearlescent spiderweb glaze
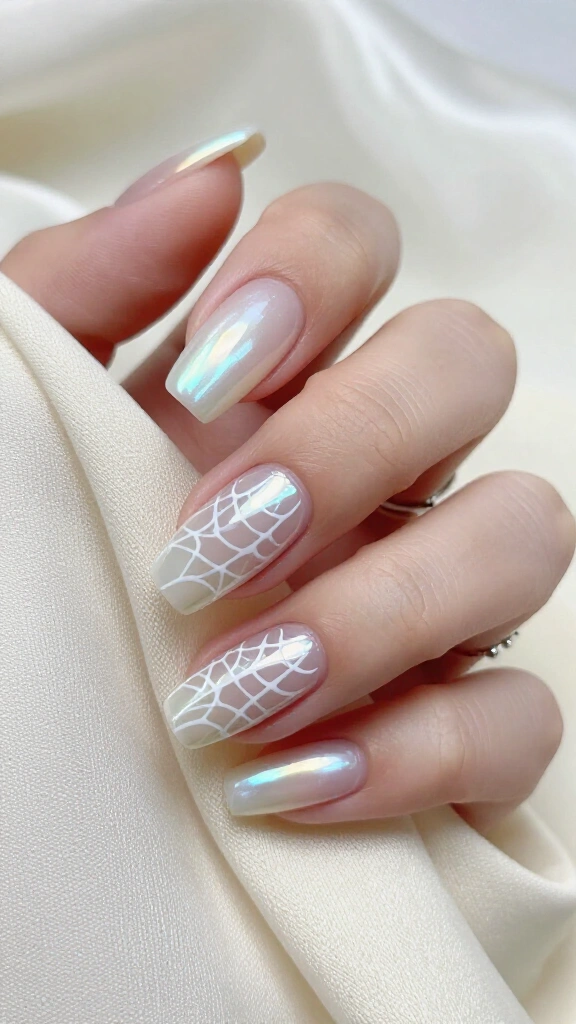
Layer fine cobweb art over chrome powder for a glowing finish. Apply a sheer white base, cure the layer, and buff white-chrome powder across the surface. The high-shine chrome catches light cleanly throughout the day.
Use opaque white liner gel to paint razor-thin webs branching out from the cuticle corner of your accent nails. The clean lines and reflective finish echo the high-fashion editorial styling featured in Harper’s Bazaar. Seal the set with a non-wipe top coat to preserve the gloss.
3. Bone white ribcage almonds
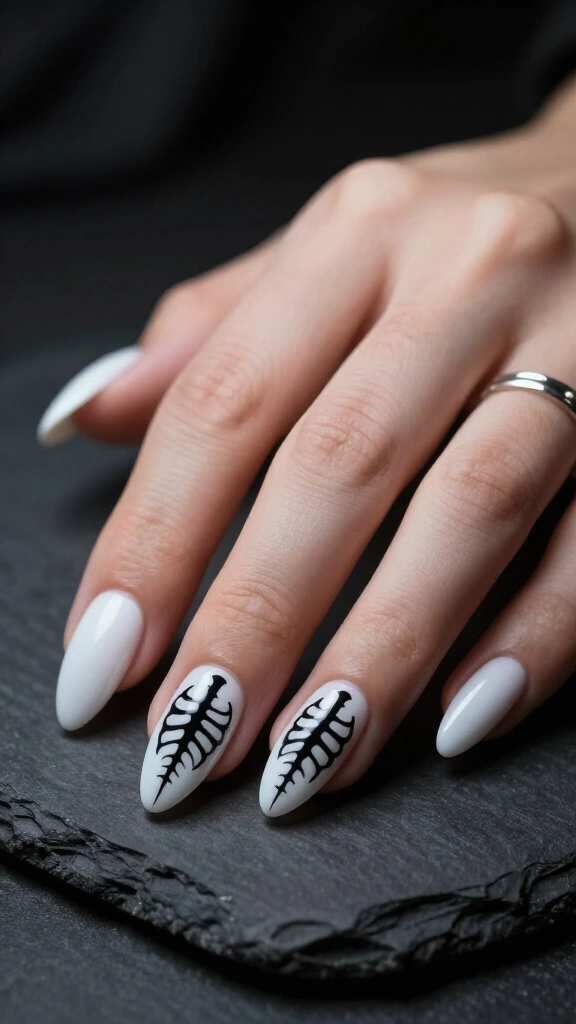
Skeletal anatomy instantly channels October, and sharp linework keeps the look modern. Shape your nails into clean almonds to lengthen your fingers, then apply a solid chalk-white base.
Pick up a black striping brush to outline negative space ribs and spinal contours across the center. The stark contrast gives the manicure an architectural, graphic feel. Keep your lines precise for the cleanest result.
Pro artist application tip
- Wipe the sticky dispersion layer off your white base before drawing the ribs so the black gel does not bleed.
- Use a 7mm liner brush to draw smooth, continuous curves.
4. Matte chalk-white mummies
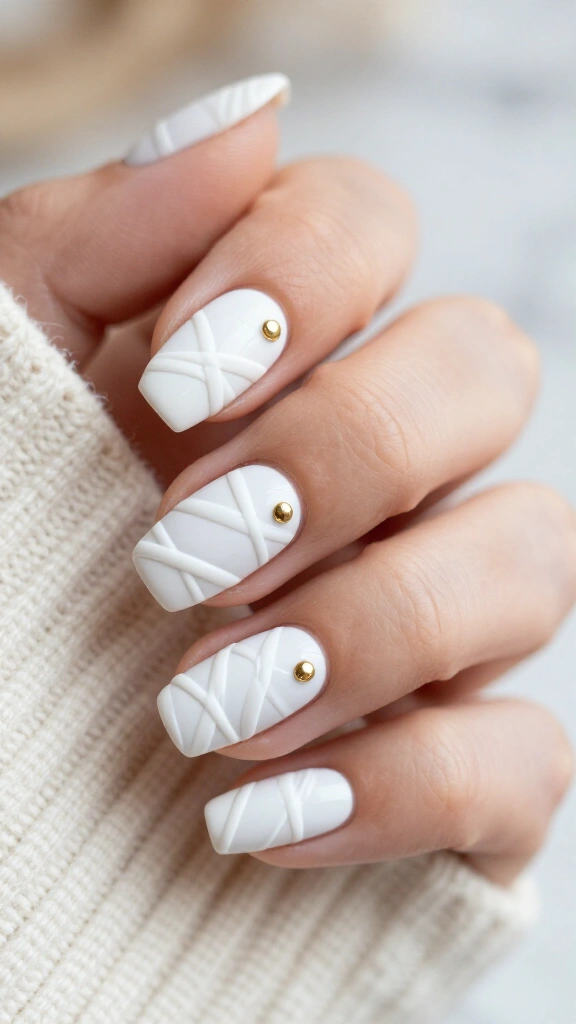
Texture changes everything in a monochrome palette. Paint your nails with an opaque white polish and seal them with a flat matte topcoat. The matte surface creates a clean, unexpected canvas.
Paint thin horizontal and crisscross lines across your accent nails using a high-gloss white gel to mimic linen mummy wraps. The subtle contrast between matte and gloss builds depth without requiring extra color. Press two small gold studs near the top for the eyes.
5. Opal cobweb negative space
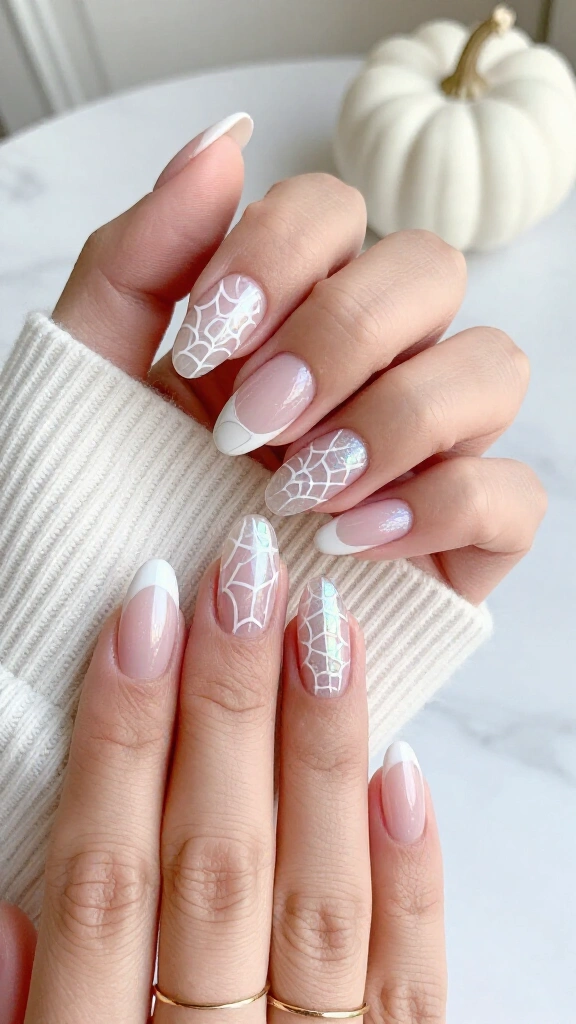
Negative space manicures look polished and grow out gracefully. Paint your nails with a sheer pink builder base, leaving the middle section clear while painting crisp white geometric webs along the outer edges. This placement hides new nail growth so your set lasts longer.
Brush an iridescent shimmer coat over the bare negative space before drawing your web lines. The finished design looks like morning dew on late October webs, giving you an intricate look that requires very little upkeep.
6. Pearl-studded drip manicure
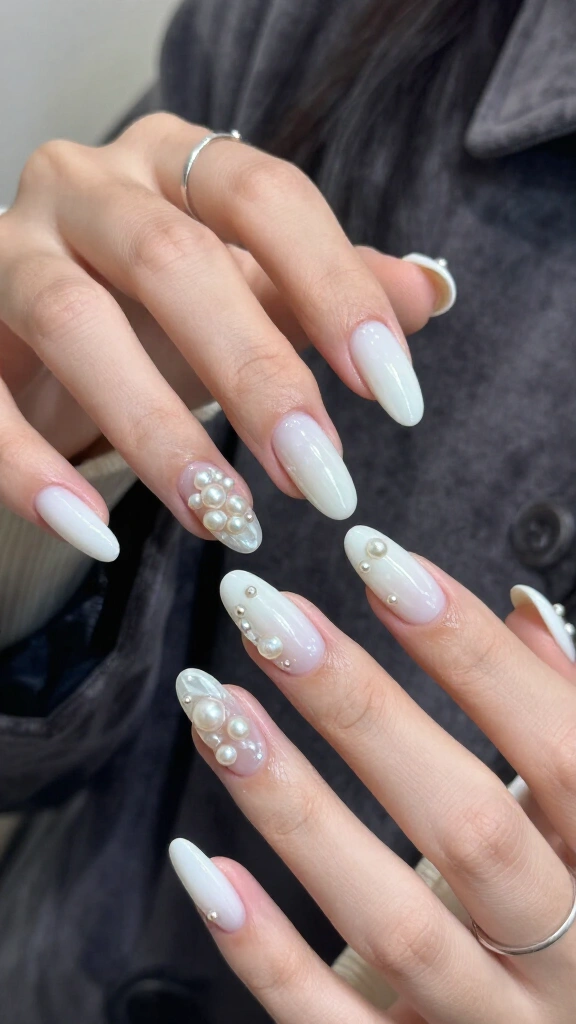
Skip bright red fake blood in favor of sculptural clear gel. Apply a clean white base, then sculpt three-dimensional drip shapes along the cuticle line using a thick builder gel. These raised drops catch the light with every move you make.
Set miniature flatback pearls into the wet builder gel before curing the layer under your lamp. The pearls soften the dripping motif into an elegant, moody statement. Trend coverage from Byrdie confirms that 3D pearl embellishments continue to dominate modern nail art.
7. Alabaster celestial witch nails
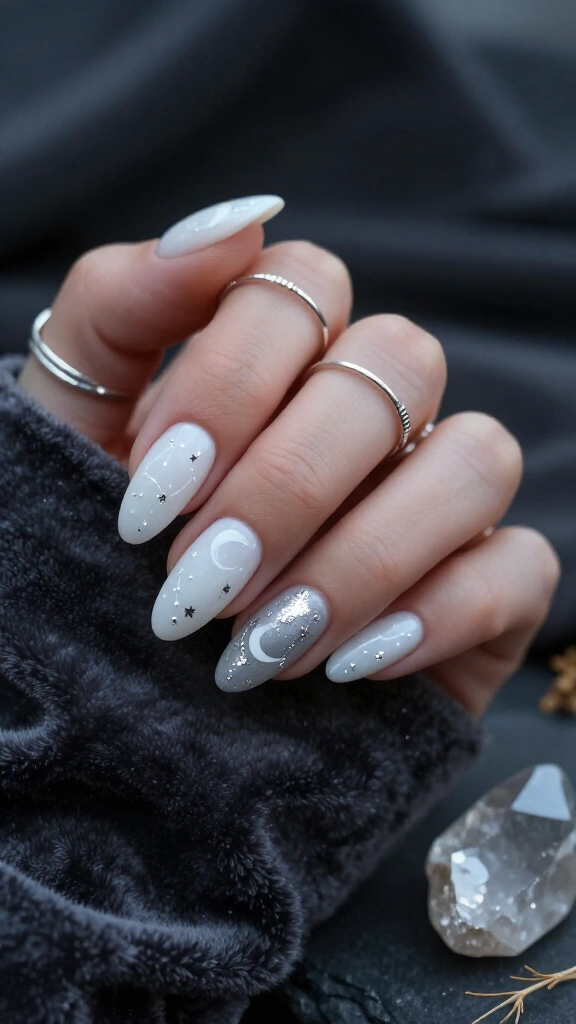
You do not need dark polishes to channel mystical themes. Coat your nails in opaque alabaster to build a clean surface reminiscent of parchment. Then, paint subtle white or pale gray moon phases and constellation stars across the nail plate.
Press tiny flecks of silver foil into the center of each crescent moon to catch the evening light. The look feels light, crisp, and slightly otherworldly. Pair this set with simple silver rings to complete your October style.
8. Chrome Ghostface micro-accents
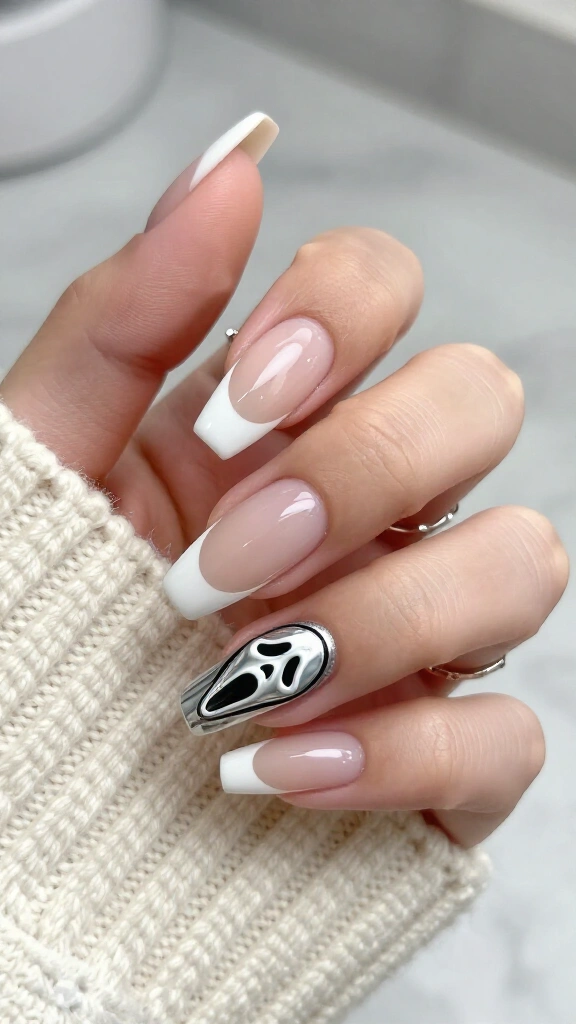
Slasher motifs can look crisp when you scale them down. Paint clean white French tips across most of your fingers, saving your ring finger for an accent detail. On that nail, sketch the elongated Scream mask using thin lines over a sheer milky background.
Buff reflective chrome powder over the mask art to give the character a polished metal sheen. The subtle pop-culture nod stays sleek rather than messy, making people look twice to spot the fine details.
9. Minimalist white stitches
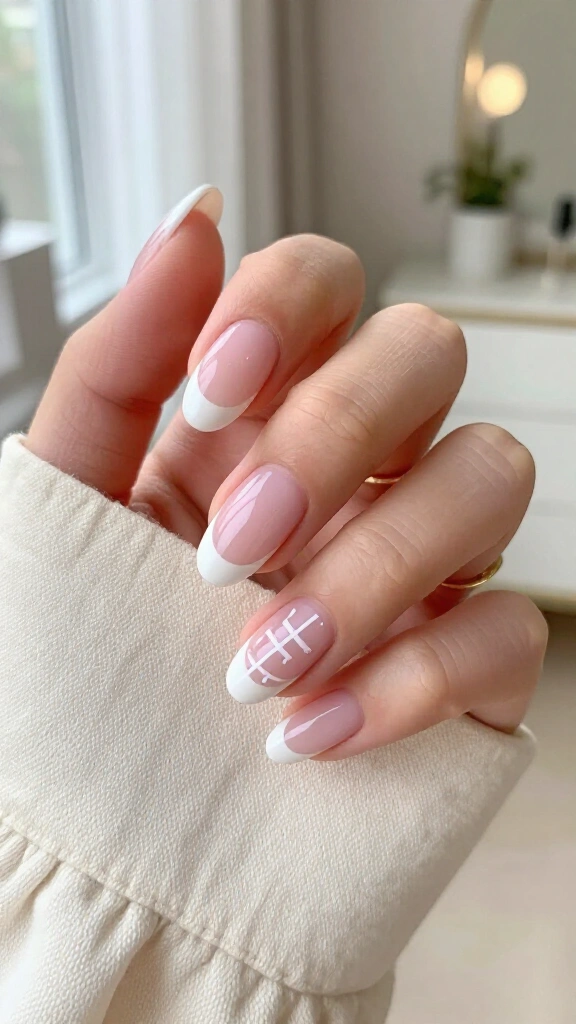
Reinterpret classic monster lore through clean, minimal linework. Start with a healthy sheer pink base that mirrors a classic manicure. Paint a single curved white stroke across each nail bed to mark an incision line.
Cross that line with tiny white dashes using a fine detail brush to create suture stitches. The design pays homage to Frankenstein without clashing with professional workwear. If you enjoy quick salon designs, look through these simple Halloween nail designs for more ideas.
10. White velvet cat-eye phantom
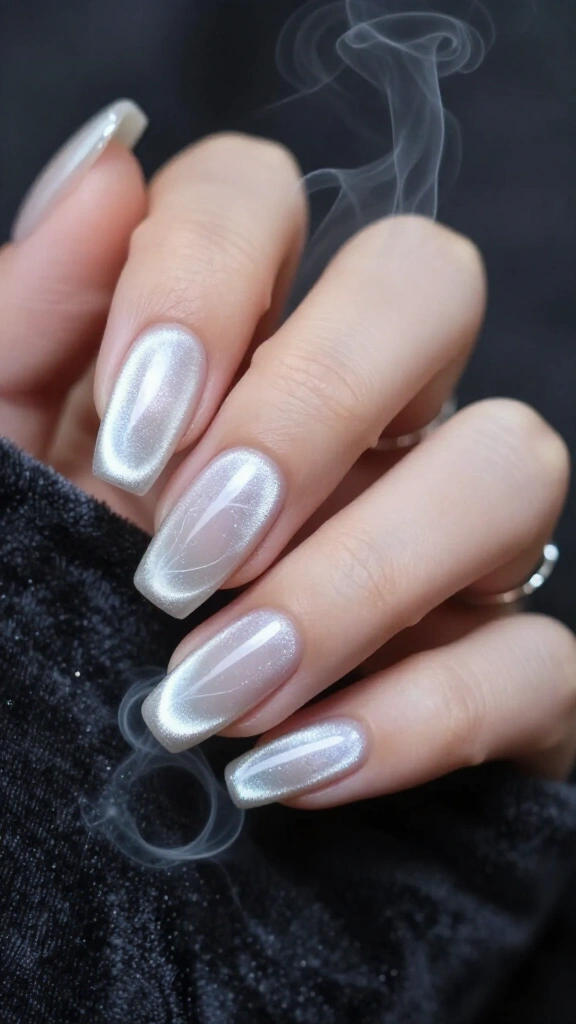
Magnetic cat-eye polish creates striking depth on natural nails. Apply an icy silver-white magnetic gel over a translucent base coat. Hold your magnet wand over the wet gel to draw the shimmer particles toward the center, creating a glowing velvet effect.
Paint sheer, ghostly wisps over the cured shimmer layer so the artwork looks suspended inside the polish. The dimensional finish catches the light like fog over water.
11. Bleached gothic crosses and filigree
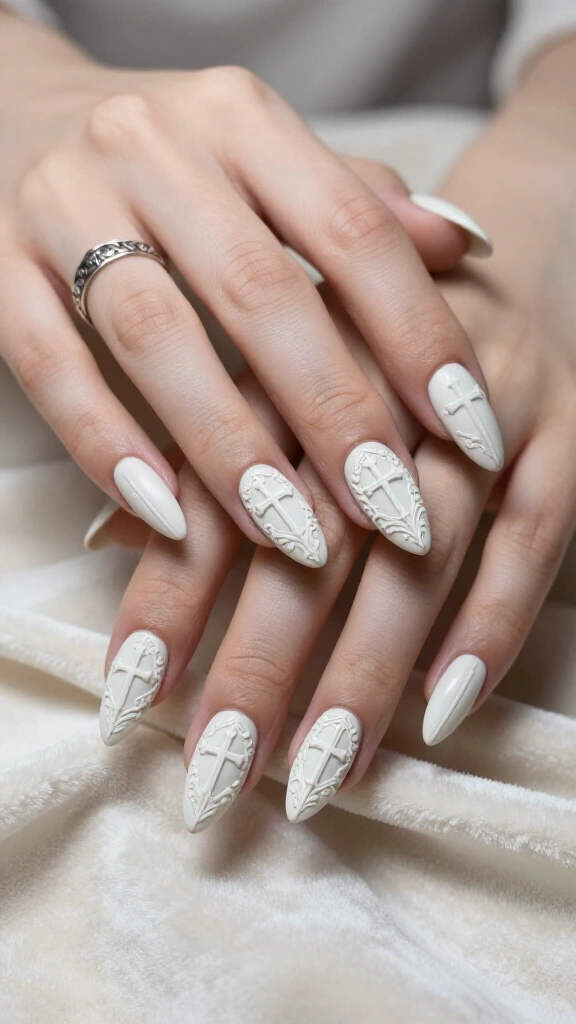
Draw inspiration from cathedral architecture and vintage ironwork. Apply a chalky off-white base to set a subtle antique tone. Then, use an opaque pure-white art gel to draw baroque crosses and fine vine patterns across the nail.
The soft difference between the off-white base and pure white lines creates an understated relief effect. This architectural approach delivers gothic drama without using black polish. The design works especially well on medium coffin or almond shapes.
12. Sheer coconut milk dripping slime
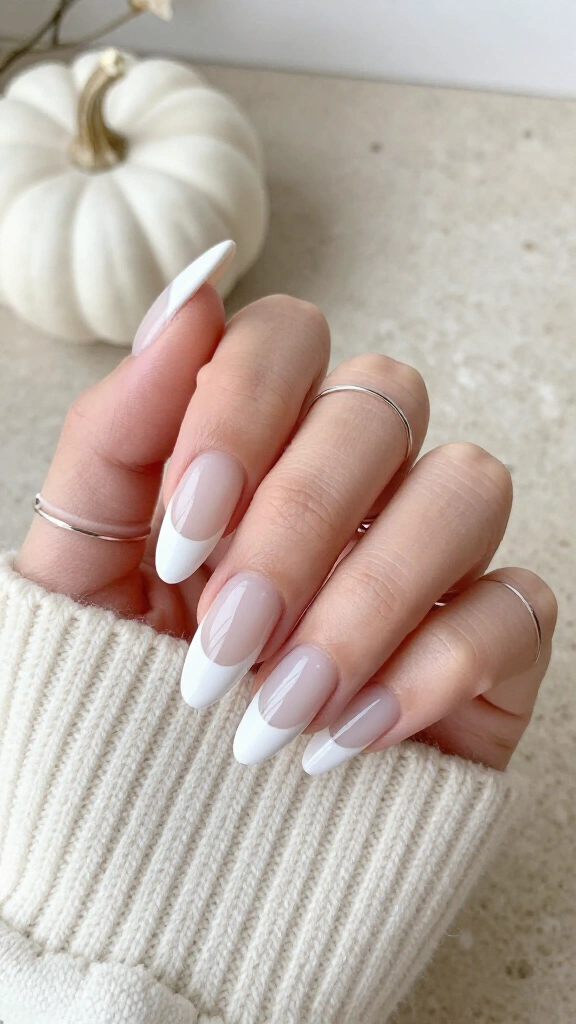
Take the popular slime motif and remove the cartoonish green tones. Paint your nails with two coats of sheer coconut-milk gel polish for a clean foundation. Using solid white paint, draw dripping shapes running down from the tip.
Because you stick to white-on-white tones, the drips read as liquid gloss rather than Halloween grime. You get a nod to the season wrapped in a clean, modern aesthetic.
13. Clean white micro-bats
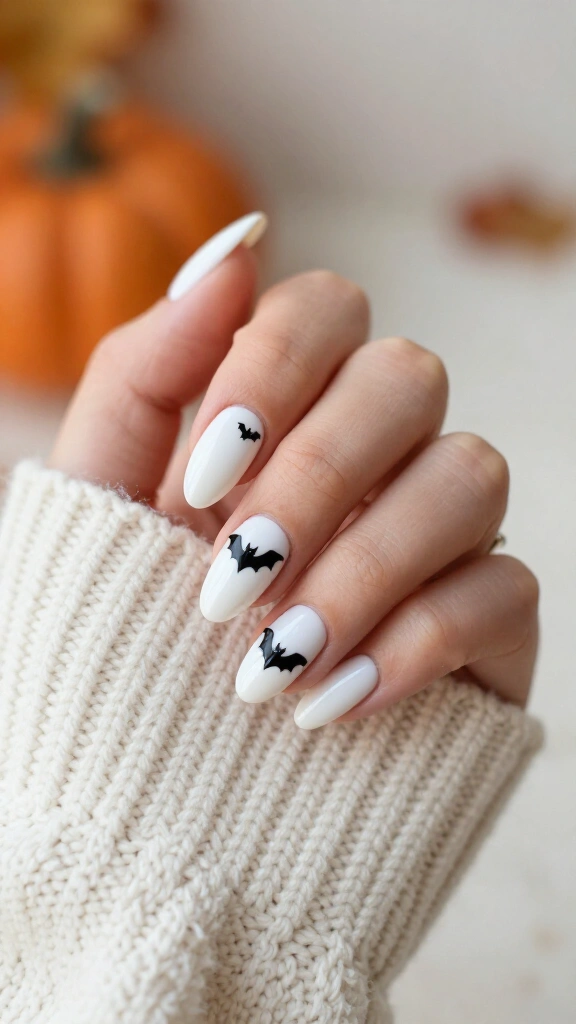
Small accents make a crisp statement when you keep your layout balanced. Paint a bright, opaque white gel across all ten nails, then finish with a clear high-shine top coat to seal the base.
Paint three tiny silhouette bats across one or two accent nails using a fine detail brush. Keeping the bats miniature keeps the manicure subtle. The final look stays playful and neat.
How to paint a micro-bat in three steps
- Place two tiny dots side-by-side for the head and body.
- Pull two curved lines outward from the body to create the top wings.
- Connect the wing tips back to the body with two small scalloped arcs.
14. Frosted glass skeleton hands
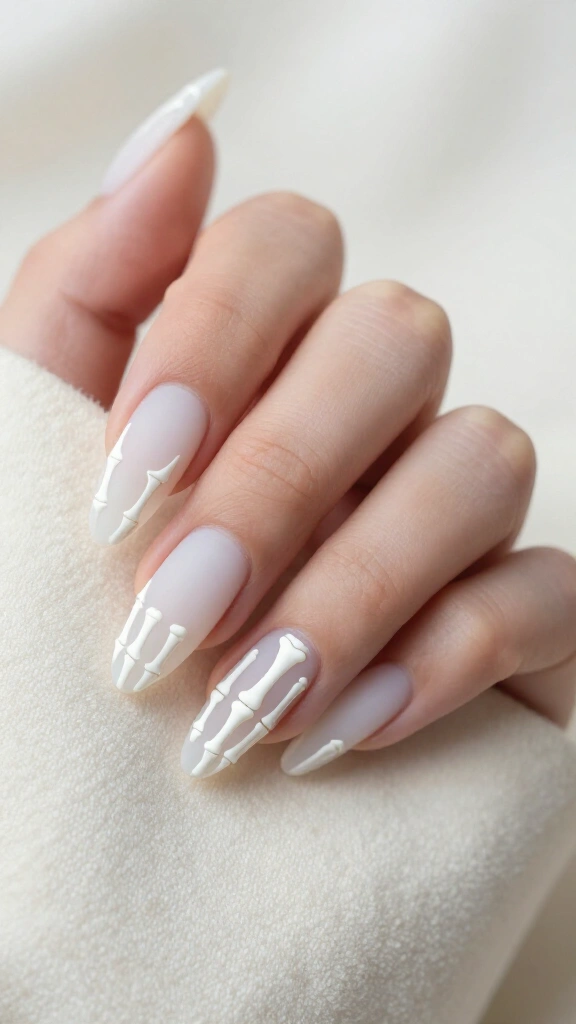
Sea-glass manicures offer a fresh take on negative space. Apply a matte top coat over clear nail extensions to produce a frosted glass effect. Then, paint white skeletal finger bones wrapping along the edges of the nail plate.
Because the background stays translucent, the skeleton art appears to hover over your natural nail bed. Editors at Allure regularly point to sheer negative space as a top seasonal trend, and this design creates a clever visual illusion.
15. Haunted marble quartz
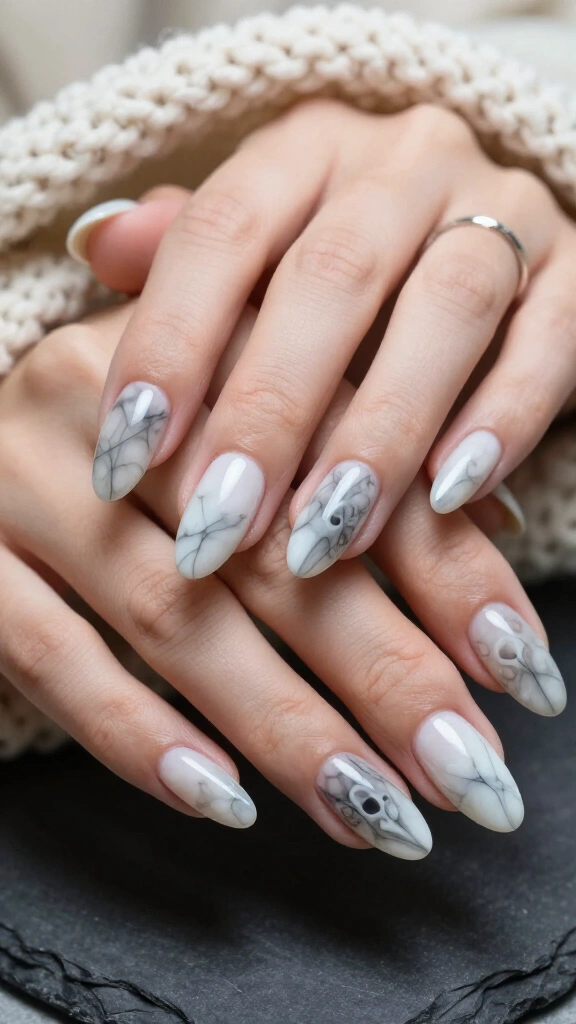
Combine white Carrara marble patterns with soft smoke effects. Paint a solid white base, then disperse pale gray blooming gel across the wet coat. Blend the gray lines with an acetone-dipped brush to create natural stone veining.
Paint faint ghost silhouettes or skull outlines into the deepest gray swirls. From a distance, your nails look like white quartz. Up close, friends will spot the subtle ghostly figures hidden in the stone pattern.
16. White gold jack-o’-lantern smirks
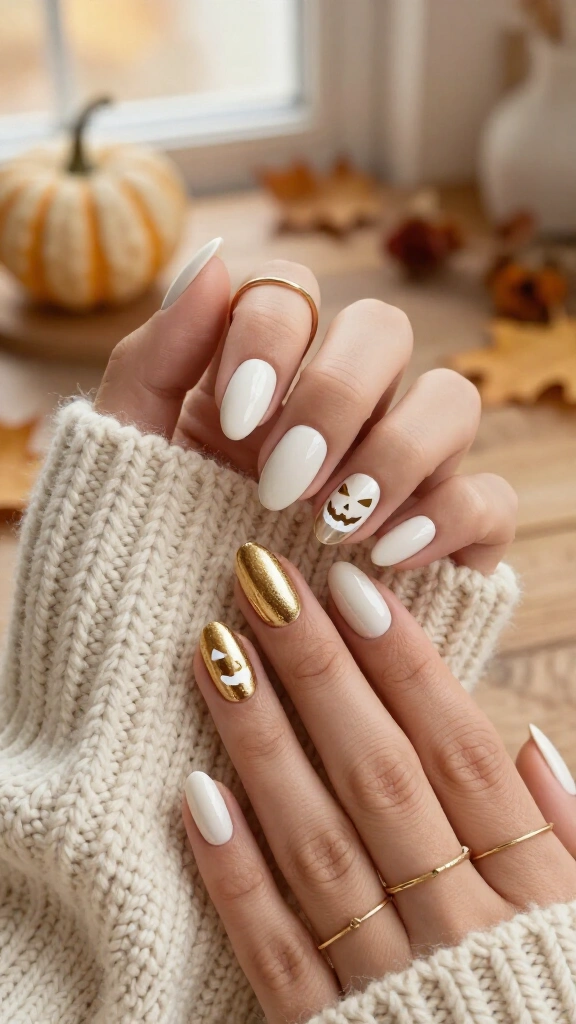
Carved pumpkins do not require bright orange polish. Coat your nails in a warm vanilla-white that pairs naturally with fall sweaters. Use fine white and metallic-gold line work to sketch the angular eyes, nose, and smile of a classic Jack-o’-lantern.
The metallic gold catches the light, turning a traditional pumpkin design into an understated autumn accent. The warm white palette carries smoothly through the entire fall season.
17. High-gloss white outlines and floating spirits
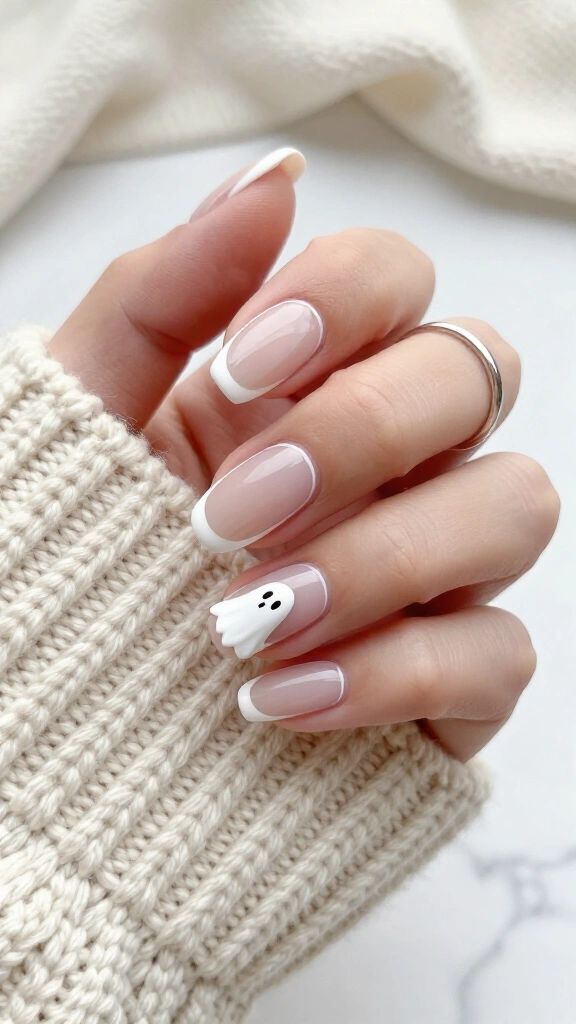
Graphic perimeter outlines give your nails a clean, framed look. Trace the outer border of each nail with an opaque white line, leaving the center clear and glossy. This framing technique creates an immediate graphic effect.
Paint a small floating spirit inside the clear center of your middle finger. The straight borders balance the soft curves of the ghost, creating a balanced, contemporary design.
Chic ways to rock white nails this October
White Halloween manicures prove that you do not need bright colors or artificial blood to celebrate spooky season. By combining contrasting textures, milky bases, and precise linework, you can embrace the holiday while keeping your hands looking sharp and office-ready.
Proper nail preparation ensures clean results with white polish. Smooth out your nail plate with a ridge-filling base coat, and apply cuticle oil daily to keep your skin hydrated. Pick your favorite design from this list and show it to your nail tech at your next appointment.
