Skip the crowded nail salon and the holiday appointment rush this year. A clean silver manicure looks expensive and festive, yet it requires very little technical painting skill.
Silver polish gives you immediate holiday sparkle, whether you prefer mirror chrome or subtle metallic accents. If you read our guide to minimal Christmas nails, you already know that small details make a big impact. These sixteen silver designs look like high-end salon work, but you can finish them quickly at your own desk.
1. Liquid Mirror Silver Chrome
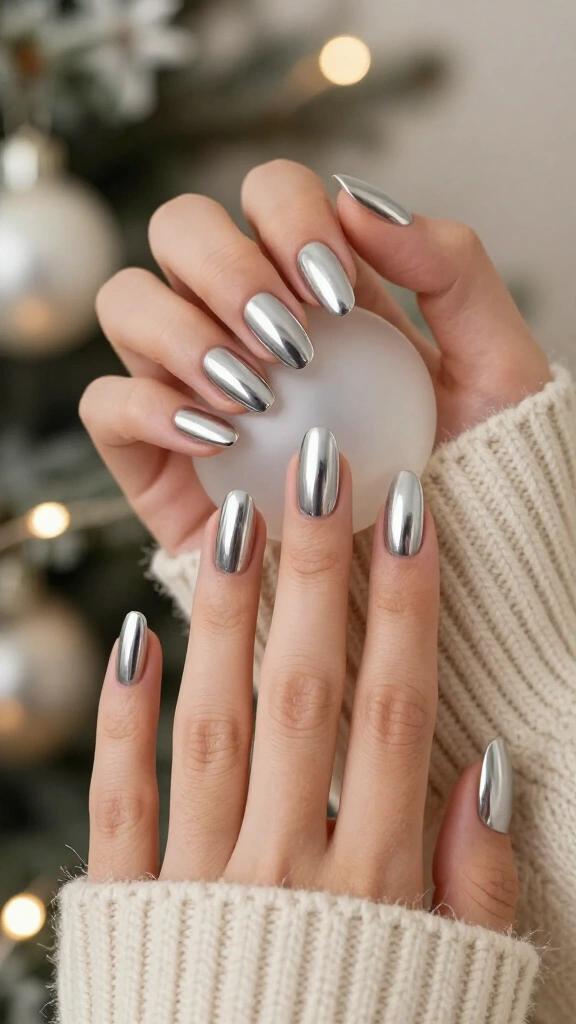
A mirror chrome manicure reflects light like polished metal. You do not need steady hands or intricate line work to get this finish. Buff fine silver chrome pigment over a tack-free gel topcoat using a small sponge applicator, and the powder instantly transforms into a smooth, reflective surface.
To protect the finish and prevent chips, brush two layers of clear topcoat over the edges. Writers at Allure note that rubbing chrome powder immediately after curing locks in the smoothest reflection. This technique creates a cleaner mirror finish than standard silver glitter polish.
2. Frosted Silver French Tips

Update the classic French tip with a cool silver edge for winter. Paint your nail beds with a semi-sheer milky pink, then sweep silver lacquer across the tips. Curved nail guides or a silicone nail stamper help you stamp crisp, consistent smile lines in seconds.
For extra texture, sprinkle fine platinum glitter over the wet silver polish before it sets. This design looks crisp, clean, and pairs naturally with winter party clothes.
3. Silver Foil Flecks on Sheer Milky White
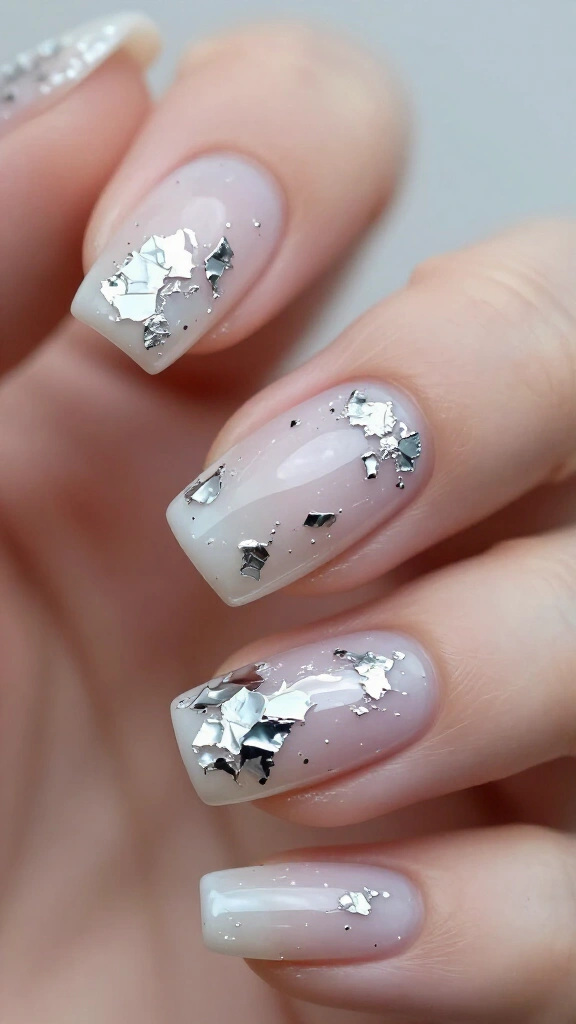
This style benefits from an irregular pattern. Paint two thin coats of sheer milky white polish to build an even base. While the second coat remains slightly tacky, press torn scraps of silver transfer foil onto random spots across each nail using tweezers.
Irregular placement gives the foil an organic, crushed stone look, so you do not have to worry about symmetry. Seal the design with a thick clear topcoat to smooth out the foil edges and build shine.
4. The Platinum Glitter Waterfall
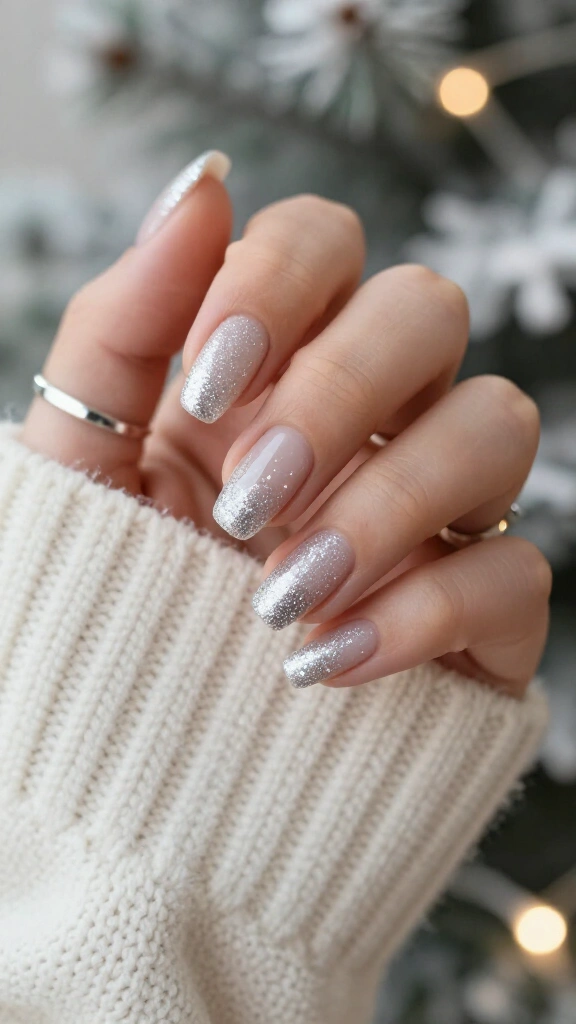
Glitter gradients look complex, but a makeup sponge creates the blend easily. Paint your nails with a neutral nude base coat so the metallic flecks stand out. Dab silver glitter lacquer onto the corner of a cosmetic sponge, then press it lightly against your cuticles, fading the coverage downward toward the middle of the nail.
The density near the cuticle creates a clean fade that looks like falling snow. You can alternate this set with other holiday nail colors when you want a versatile manicure for the week.
5. Molten Metal 3D Swirls
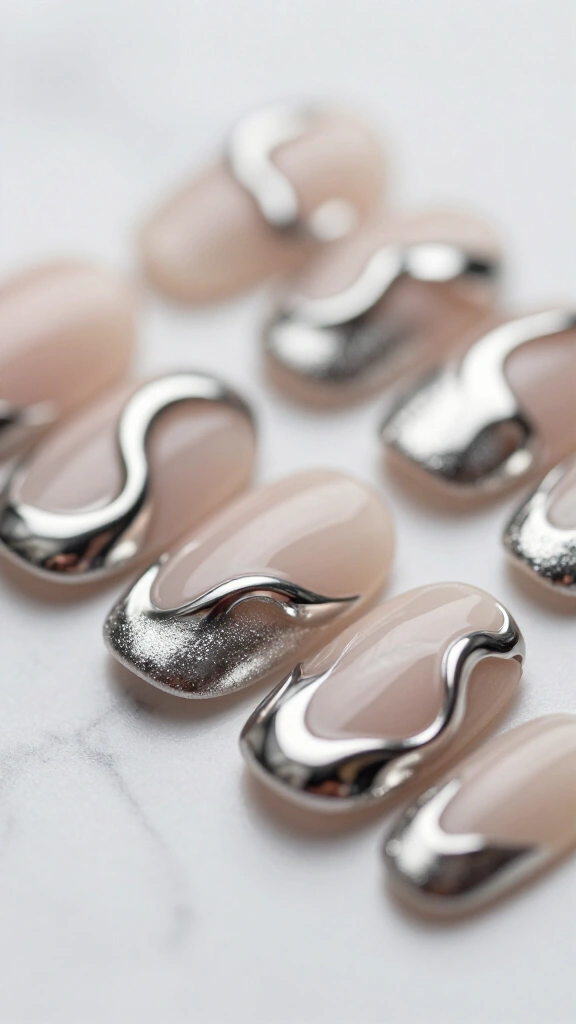
Three-dimensional nail art adds great texture, and you can create it at home without pro tools. Paint a neutral base coat, then use a thin striping brush dipped in clear builder gel to draw raised lines across each nail. Cure the gel under your lamp to set the raised pattern.
Next, rub silver chrome powder over those raised ridges and brush away any excess powder from the flat base. The chrome clings to the raised gel, creating liquid silver curves across your nails.
6. Sleek Silver Micro French
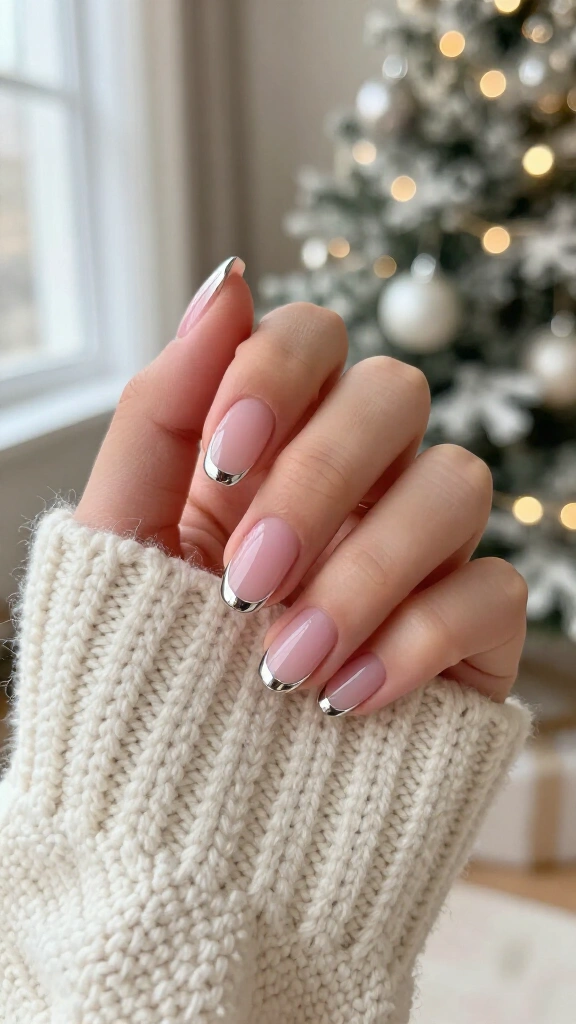
Short nails look great with metallic accents. A razor-thin silver line along the very tip elongates your nail beds and keeps the design clean. Leave the base bare, or coat your nails with a sheer pink ridge-filling polish.
To paint a straight line without a shaky hand, keep your striping brush still and roll your finger slowly from side to side. This small accent delivers clean holiday shine without overwhelming short nails.
7. Silver Velvet Cat-Eye Magic
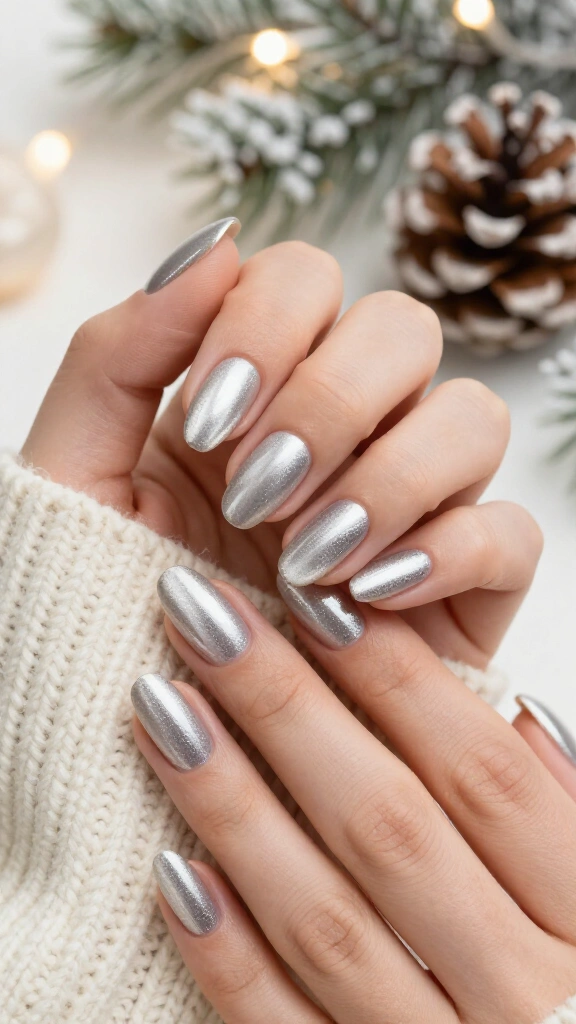
Magnetic polishes give your nails a shifting, textured shimmer under bright light. Paint a layer of magnetic silver cat-eye polish onto your nail, then hold the included wand magnet diagonally over the wet coat for ten seconds. The magnet pulls the tiny metallic particles toward the surface to create a plush, velvet sheen.
Beauty writers at Byrdie regularly suggest magnetic polishes for quick seasonal sets. The polish does the work for you, eliminating the need for hand-painted art.
8. Starburst Metallic Accents
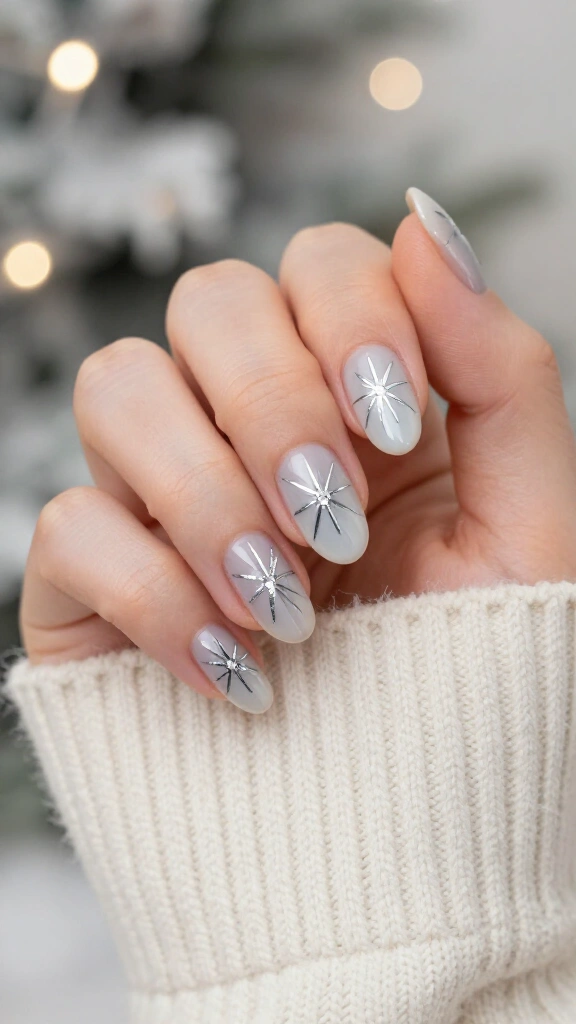
If you can draw a basic cross, you can paint clean holiday starbursts. Start with a glossy bare nail or a pale gray base coat for background contrast. Use a fine detail brush and silver chrome polish to paint a small vertical cross, then pull four short diagonal rays outward from the center point.
Place a silver bead or micro-rhinestone in the center of the star using nail glue. These small stars bring a vintage holiday feel to your nails without demanding precision painting.
9. Disco Ball Chunky Holographic Accents
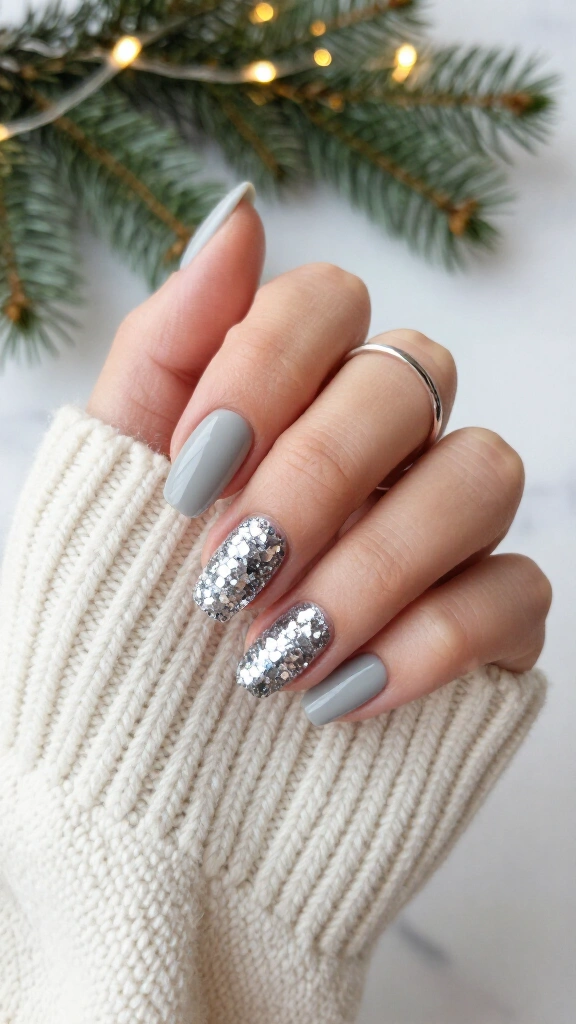
Bring New Year energy into Christmas week with a bright glitter accent nail. Paint four of your nails in a flat dove gray or crisp white to keep the overall look balanced. Save your ring finger for the glitter design.
Press hexagonal silver glitter flakes onto that single nail using a flat brush or cosmetic sponge. Pressing the glitter flat reflects light in multiple directions, mirroring the look of a miniature disco ball.
10. Negative Space Silver Half Moons
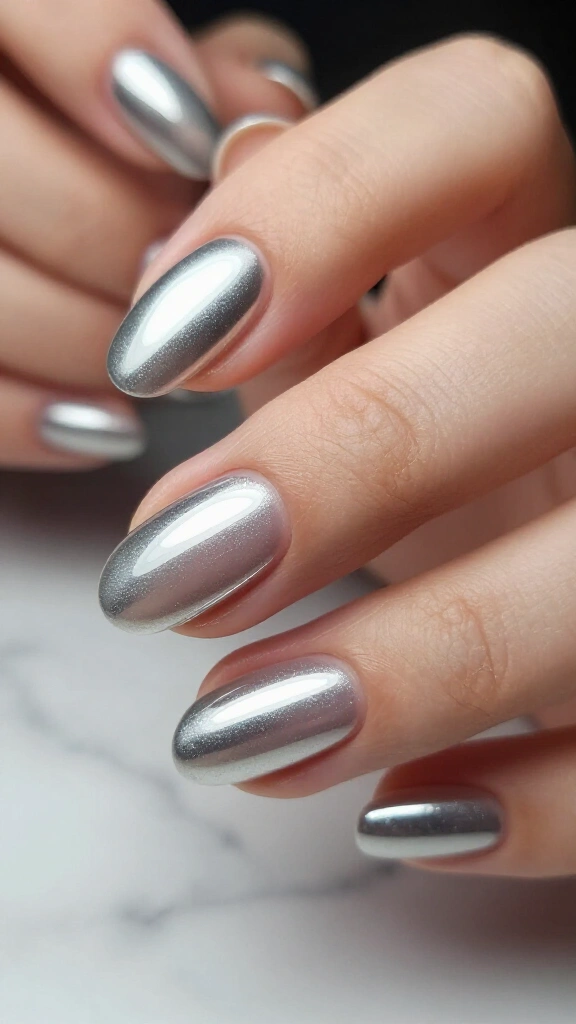
A metallic silver half-moon manicure offers a sharp, graphic style that lasts well as your nails grow. Place standard circular binder reinforcement stickers over your cuticles to protect the bare half-moon shape. Paint two coats of silver polish over the rest of the nail, then remove the stickers before the polish sets.
This leaves a crisp arch at the base of your nail. Because the cuticle area stays bare, new nail growth blends in naturally over the holidays without showing an obvious gap.
11. Icicle Metallic Drip French
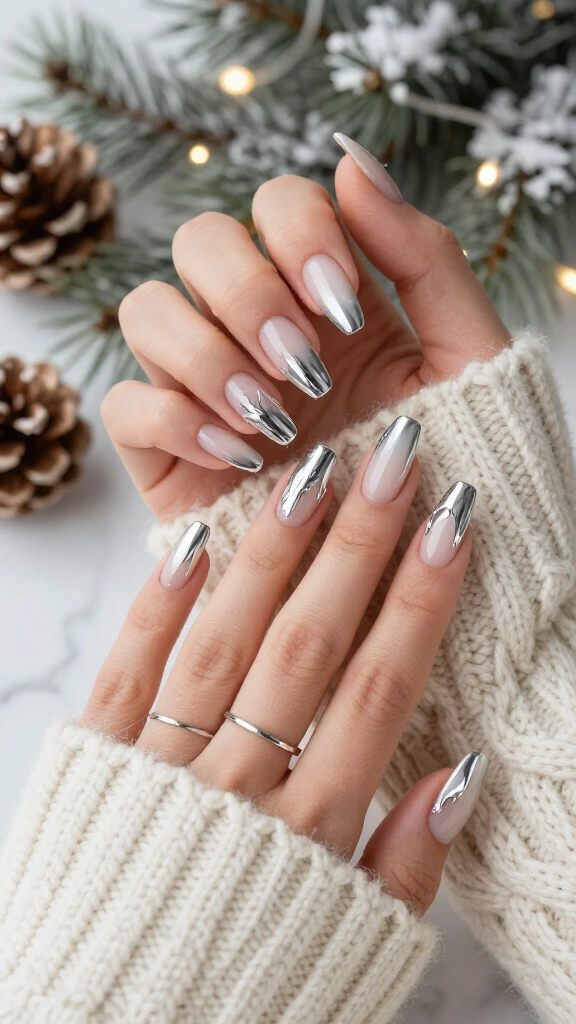
Swap a flat French tip for dripping winter icicles. Apply a sheer nude base to maintain a clean background. Use a dotting tool to drop several beads of silver polish along the tip, then drag the wet polish upward into the free edge with a clean toothpick.
This motion creates irregular drip patterns that look like melting frost. The uneven shape also conceals irregular nail lengths, making it a forgiving design for beginners.
12. Fine Silver Pinstripes on Deep Navy

Silver stands out dramatically against dark, saturated tones. Paint your nails with two coats of deep navy blue polish to create a midnight background. Once the base dries fully, press a strand of ultra-thin silver striping tape vertically down the center of each nail.
The metallic stripe cuts cleanly through the dark blue base for a tailored look. Trim each piece of tape one millimeter short of the free edge so your clear topcoat can seal the edges down completely.
13. Delicate Silver Snowflake Stamps
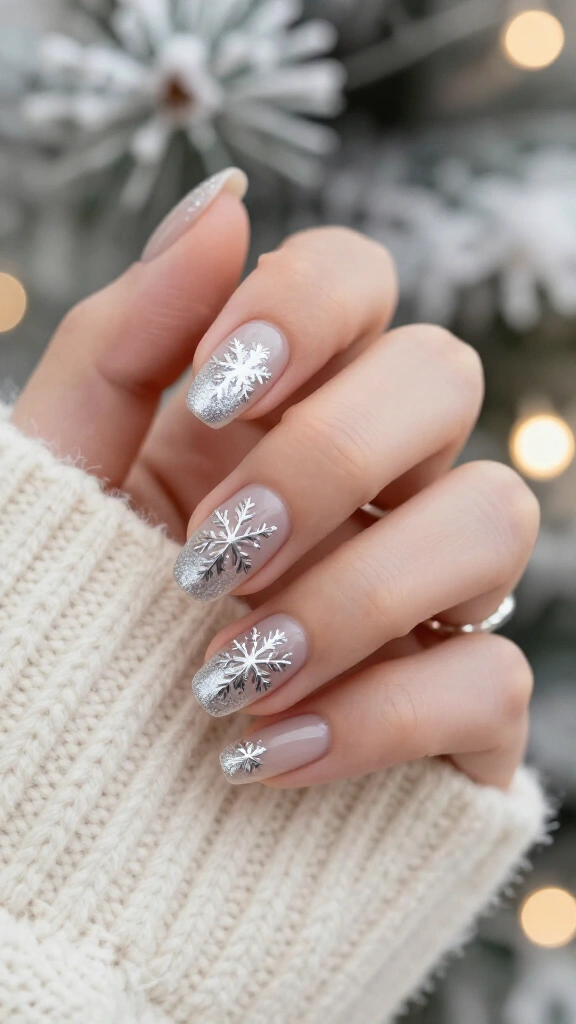
Freehand snowflakes often turn out uneven, but stamping plates solve that problem. Get a basic winter stamping plate and a soft silicone stamper. Spread metallic silver stamping polish over the etched snowflake pattern, scrape off the excess with a card, and roll the stamper over the plate to pick up the image.
Stamp the image directly onto your nail to create sharp, detailed lines in seconds. If you liked the winter transitions in our early December nail guide, this quick stamping method fits right into your routine.
14. Double-Lined Silver French Frames
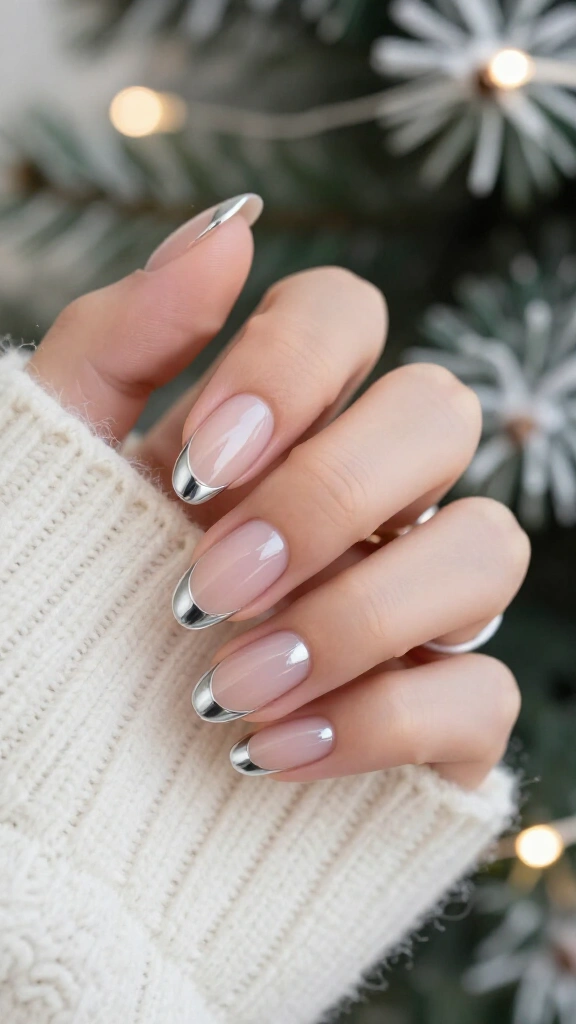
Frame your French tips with two parallel silver lines instead of one solid block. Paint a sheer nude base first. Next, draw a hairline arc along the outer edge of your nail, followed by a second parallel arc right below it. Leaving bare nail space between the two silver curves creates a modern, graphic frame.
This double line looks especially balanced on almond and oval nail shapes, helping your fingers appear longer.
15. Platinum Glitter Cuticle Cuffs
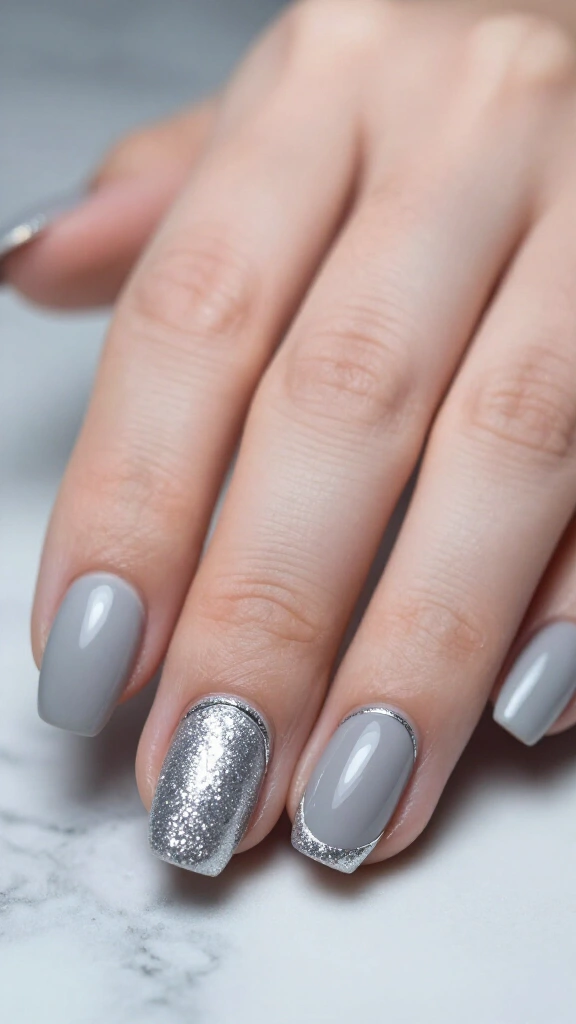
Flip the standard French manicure by placing the glitter at your cuticle line instead of the tip. Coat your nails with an opaque cream shade like slate gray, warm taupe, or dark green. Then, take a curved detail brush with fine silver glitter polish and trace along the bottom edge of each nail.
This thin curve acts like a ring of jewelry for your nail bed. It holds up well against everyday wear because the tip remains solid polish rather than glitter that could snag.
16. Frosted Ombré with Silver Foil Edges
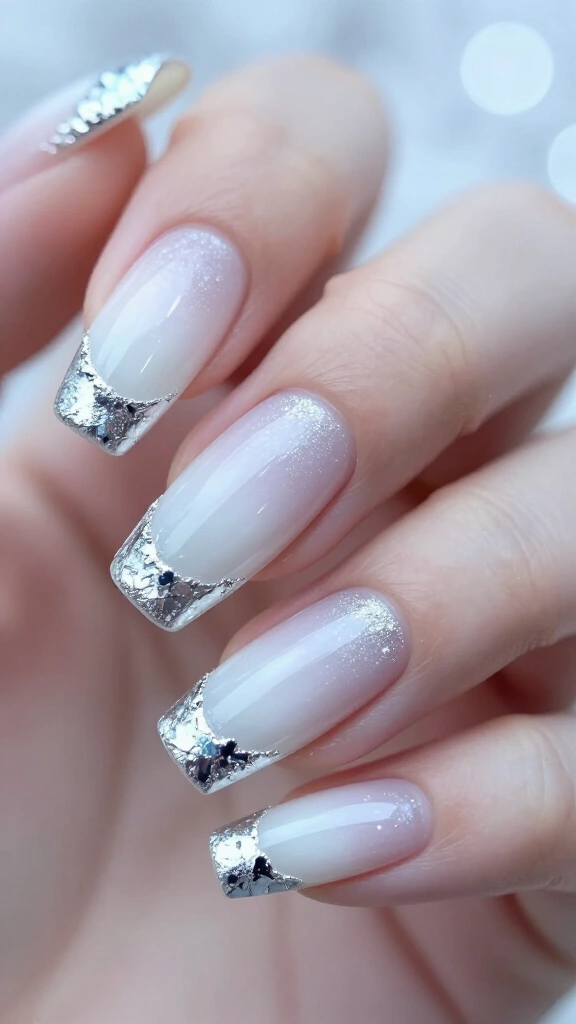
Combine a soft gradient with metallic foil for an icy finish. Dab a milky white polish onto the tips with a cosmetic sponge to create a soft ombré fade. While that layer remains slightly wet, press small flakes of silver transfer foil directly along the rim of your tips.
The white gradient provides a misty base while the foil gives the tip a bright metallic edge. Cover the entire nail with a thick, glossy topcoat to level the foil and protect the gradient.
Pro tips for long-lasting holiday nails
- Dehydrate the nail plate: Wipe each nail thoroughly with pure isopropyl alcohol before applying polish to remove natural oils.
- Cap the free edge: Run your brush over the front tip of the nail with every coat to seal the layers together.
- Reapply clear topcoat every three days: Add a thin coat of clear gloss throughout the week to protect your silver chrome and prevent edge chips.
You do not need an expensive salon appointment to get clean, festive silver nails this Christmas. Choose a design that fits your tools, pull out your favorite silver polish, and build your own holiday set at home.