Most novelty Halloween manicures look cheap. Bright plastic pumpkins, thick neon stripes, and sticky decals often resemble party leftovers rather than clean seasonal styling. You do not need loud designs to mark the holiday.
Orange works well when you pair warm undertones with minimalist techniques. Amber glazes, clean terracotta lines, and soft smoked edges give nails an intentional finish. Here are 17 orange Halloween nail designs that keep your manicure simple, polished, and sharp.
1. Terracotta Micro French with Spiderweb Tips
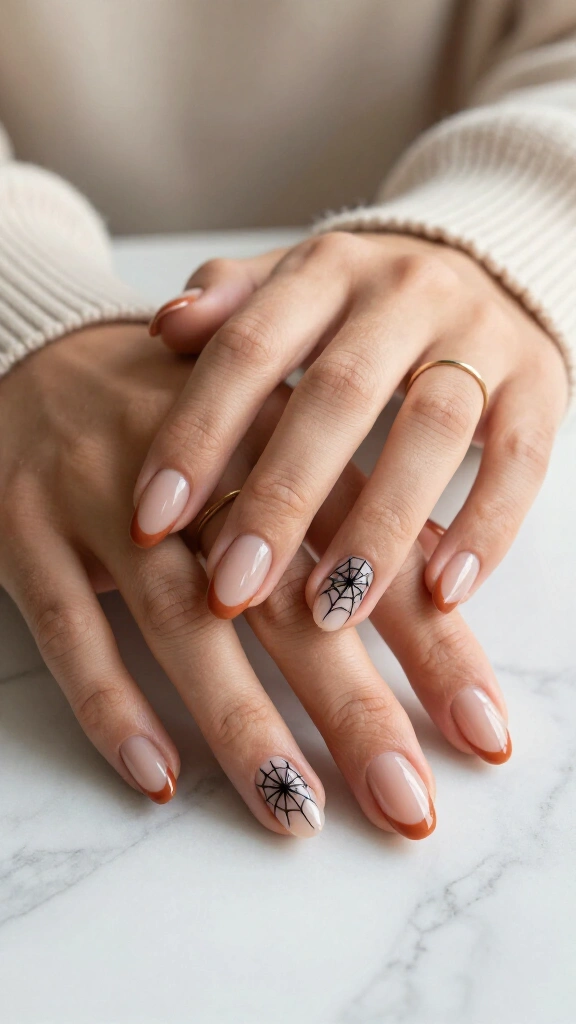
Swap bright white tips for warm terracotta. A skinny micro French line elongates short nail beds while keeping your hands tidy. Using a fine liner brush and black gel, paint a thin spiderweb across one accent nail.
This subtle layout fits right into office settings without feeling out of place. If you want more understated ideas, browse our guide to subtle Halloween nails.
2. Glazed Burnt Orange Chrome with Negative Space Moons
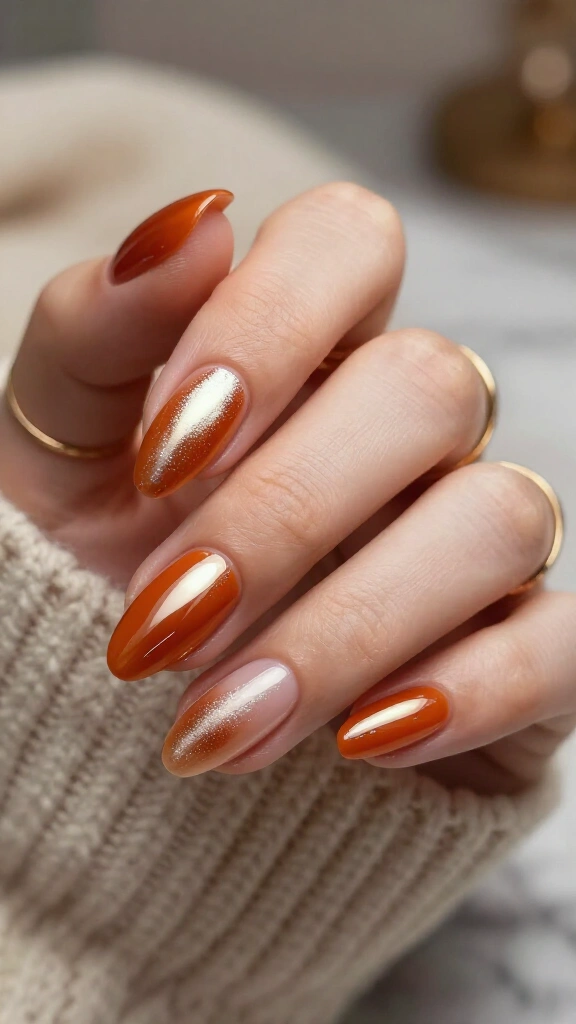
Layer a translucent burnt orange jelly polish over your bare nail, then buff pearlescent white chrome powder over the surface. Leave the half moon area at your cuticle bare to create clean negative space.
The chrome powder gives the orange jelly a reflective mirror sheen. As writers at Allure note, chrome powders turn standard base coats into striking metallic finishes.
3. Spiced Cider Jelly Nails with Gold Foil Accents
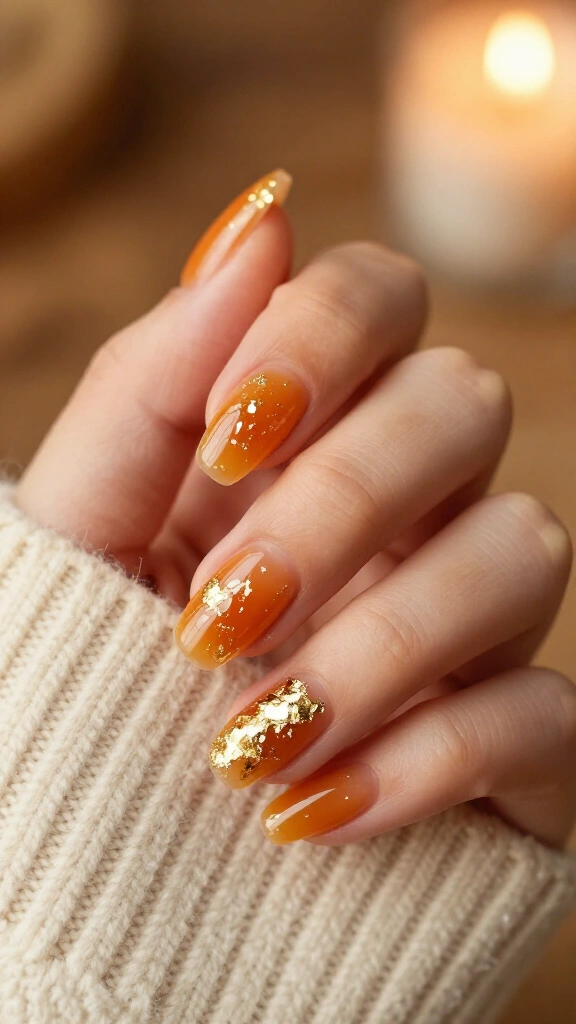
Jelly polishes create deep color while staying translucent like tinted glass. Apply two thin coats of warm cider-orange jelly lacquer. Press small flakes of gold foil onto the center of each nail bed, then seal everything beneath a thick layer of clear top coat.
The metallic flakes catch direct light against the sheer orange base. Find more warm autumn color combinations in our guide to burnt orange nails for fall.
4. Minimalist Matte Pumpkin with Tortoiseshell Accents

Mixing flat matte finishes with high-gloss accents creates strong visual contrast. Paint four nails with a rust-orange polish and finish them with a matte top coat. Paint your ring finger in a glossy tortoiseshell pattern, blending amber jelly with dark brown and black spots.
Pro Stylist Tip
Apply two coats of matte sealer to stop skin oils from turning the flat finish shiny over time. Rub a drop of jojoba oil into your cuticles daily to prevent dry edges.
5. Blood Orange Aura Nails with Black Starbursts

Aura nails diffuse pigment outward from the center of the nail bed. Dab a saturated blood-orange shade over a pale nude base using a makeup sponge or an airbrush tool. Once the gradient dries, paint small four-point black stars onto your middle nails using a nail art pen.
The diffused gradient creates a soft halo effect that looks clean and intentional.
6. Muted Apricot Nails with Delicate White Ghost Linework

Halloween nail art does not require harsh colors. Soft apricot polish offers a warm, muted background that works on both short and long nails. Paint simple ghost outlines using sheer white polish and a detail brush.
The subtle contrast keeps the ghost shapes light and minimal rather than loud.
7. Rust Velvet Cat-Eye with Celestial Gold Charms
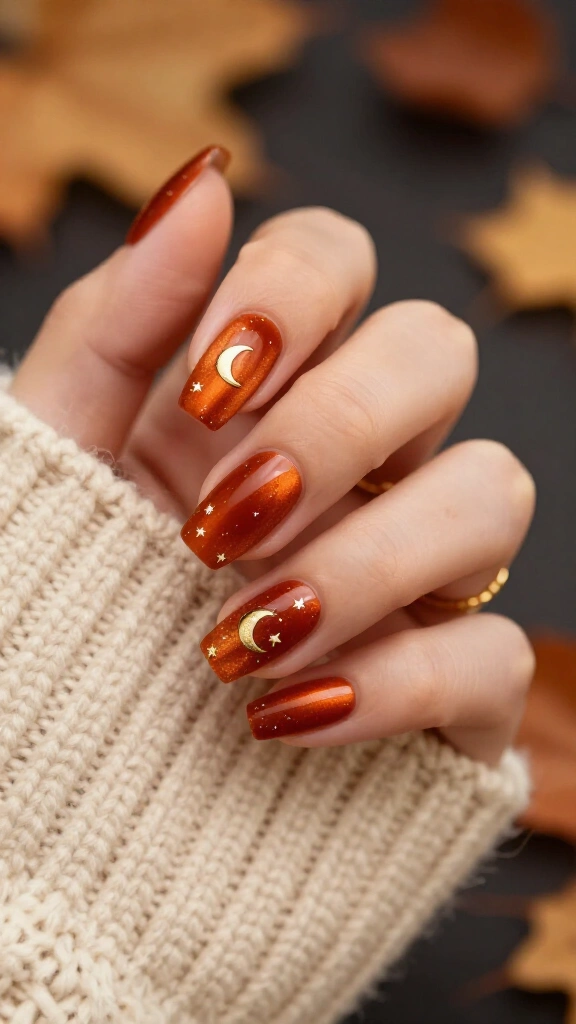
Magnetic cat-eye polish pulls metallic particles to the surface with a small magnet, creating a plush velvet effect. Apply a rust magnetic lacquer, hold your magnet near the center to pull the shimmer forward, and cure the layer. Set a tiny gold crescent moon charm into the wet top coat before your final cure.
The surface reflects light like brushed metal. Beauty editors at Harper’s Bazaar point out that velvet finishes give dark autumn manicures rich depth without heavy glitter.
8. Sunset Orange Ombré with Smoked Black Edges
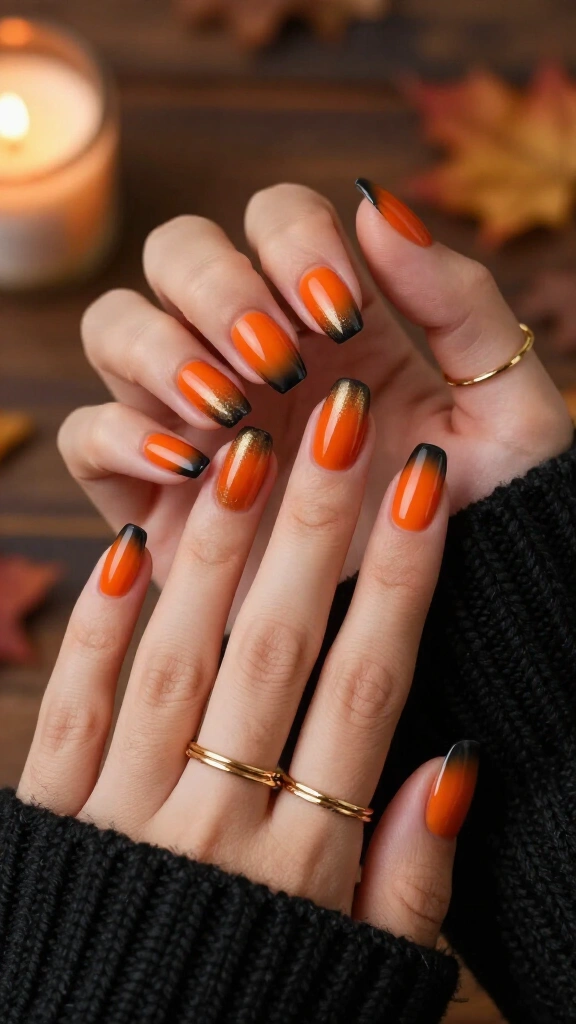
Fade bright pumpkin orange into charcoal along the outer edges of your nails. Blend the two shades across the tip and sidewalls using a cosmetic sponge. This dark outline frames almond and oval nail shapes cleanly.
The smoky border adds depth and pairs well with black knits and gold rings.
9. Tangerine Half-Dip with Ultra-Fine Gold Foil Borders
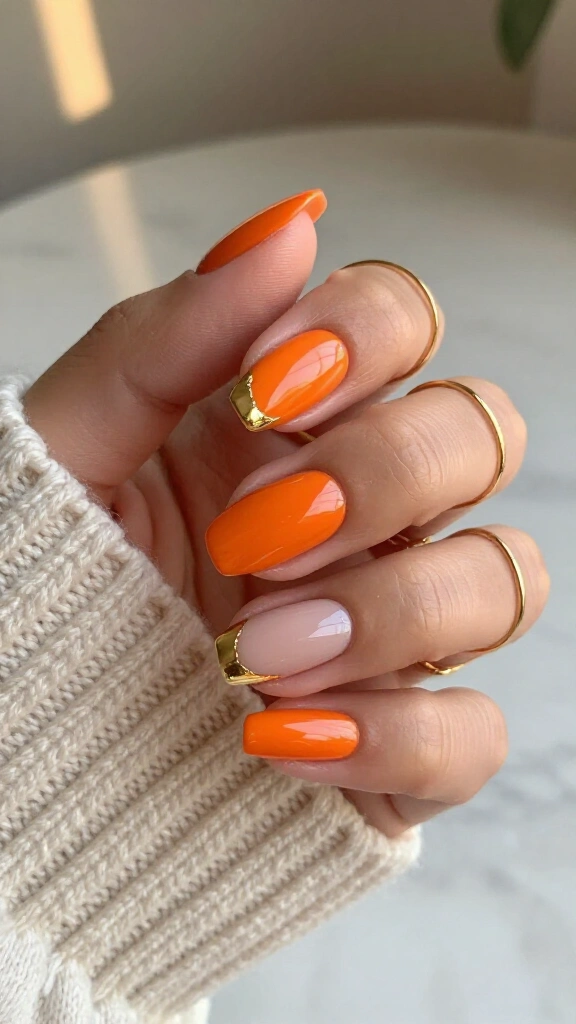
Color blocking keeps nail art sharp and clean. Paint the top half of each nail with a gloss tangerine polish while leaving the bottom half bare. Lay a strip of thin gold tape or paint a gold chrome line across the center border.
Straight geometric lines give the set a deliberate structure. For more geometric ideas, check our collection of fall orange nails.
10. Glossy Persimmon with Dainty Negative-Space Ghost Cutouts

Persimmon orange brings rich warmth to your hands. Paint every nail with full-coverage color, but place a small ghost sticker mask over one nail to leave bare space underneath. Remove the sticker and dot two tiny black specks for the eyes.
Negative space sets grow out cleanly without noticeable lines at the cuticle, helping your manicure last longer.
11. Smoked Paprika with Negative-Space Stargazer Details
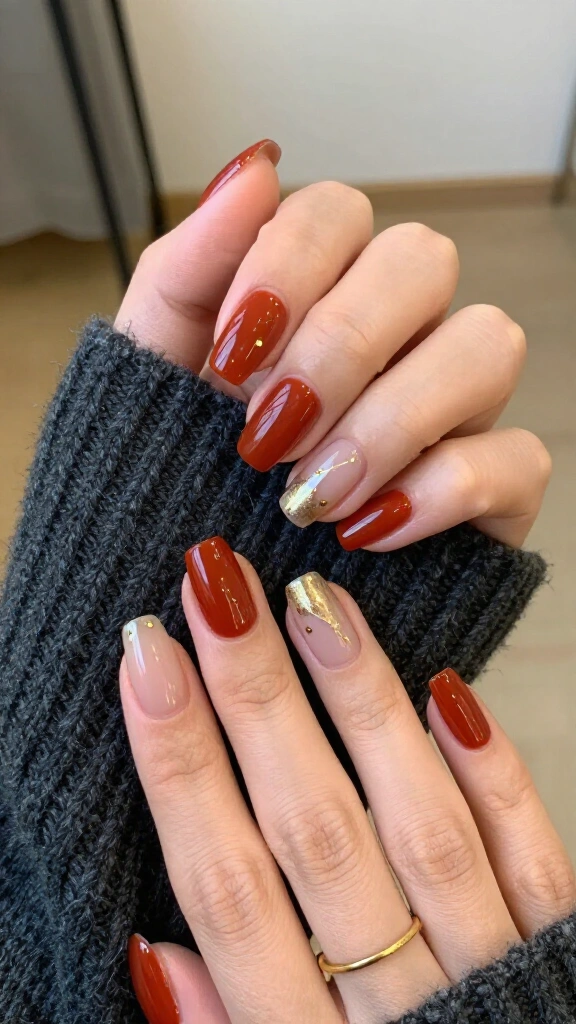
Smoked paprika has an earthy red-orange base that fits dark fall clothing. Apply the polish diagonally across half of each nail, leaving the opposite corner natural. Paint tiny gold dots along the seam to form small constellation patterns.
The diagonal lines and delicate star patterns give the manicure a refined look without relying on common party motifs.
12. Neon Peach Swirls on an Ultra-Clean Nude Base
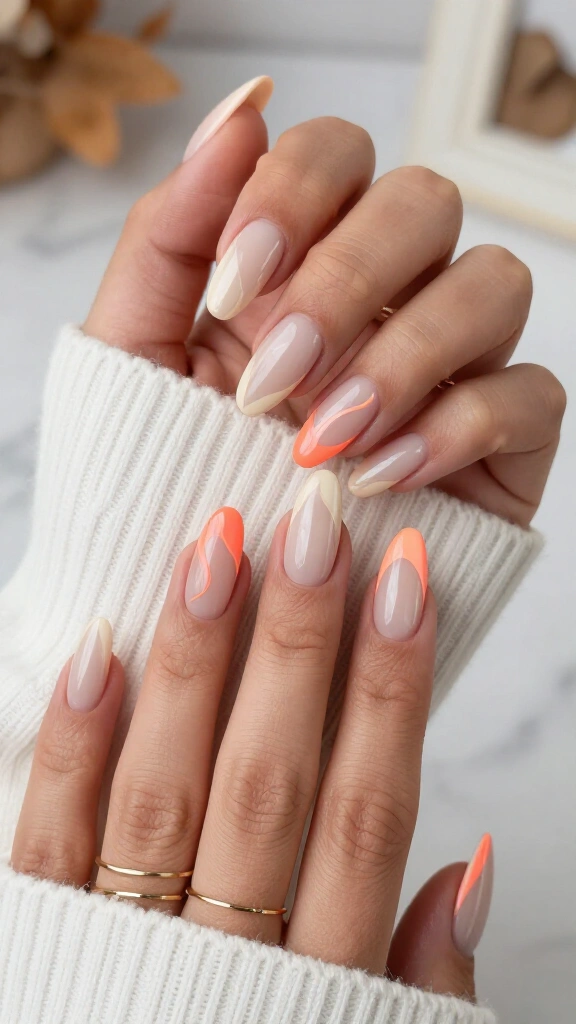
Bright peach offers a clean contrast when painted over a sheer nude base coat. Draw curved lines along the side edges of each nail using a long liner brush. The open space keeps the bright color balanced.
Curving vertical lines visually lengthen your fingers while keeping the overall look light.
13. Amber Glass Nails with Embedded Black Lace Film
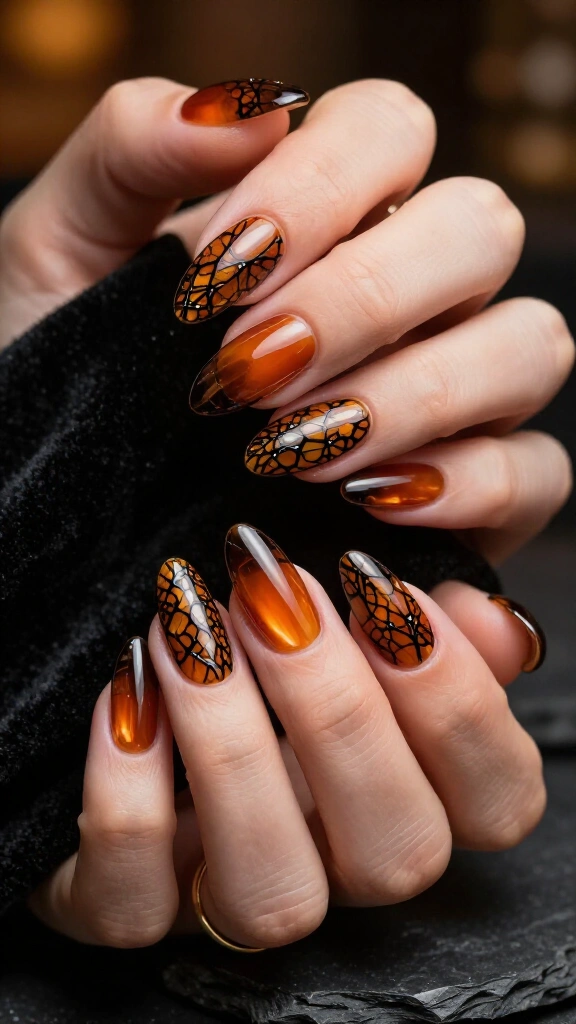
Build a stained-glass style by trapping black lace patterns inside sheer polish. Press black lace transfer foil over a clear base coat, then paint two coats of amber jelly gel over the top. The lace pattern sits suspended beneath the translucent orange layer.
File your nails into an almond or squoval shape to give the translucent layers the best depth.
14. Metallic Copper and Burnt Orange Split French

Split your French tip down the middle with two coordinating tones. Paint one half of the tip in burnt orange cream polish and the other half in metallic copper. The metallic half reflects light without hiding the clean edge of the French line.
You can paint this pattern at home by placing regular tape across the center line to keep each side straight.
15. Deep Ochre Matte Base with Glossy Blood Drips
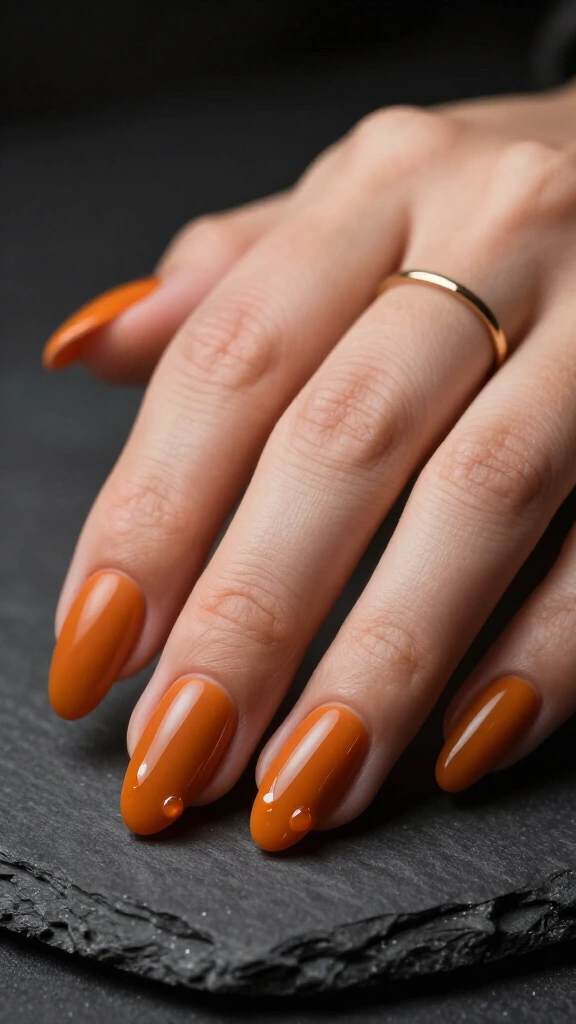
Combine opposite sheens to give classic drip art a clean look. Apply a deep ochre base polish and seal it with a matte top coat. Use a dotting tool and clear gloss gel to draw small drip shapes coming down from the cuticles.
The glossy gel catches light against the flat ochre background, keeping the drip design subtle.
16. Toasted Caramel Orange with Micro Stud Accents
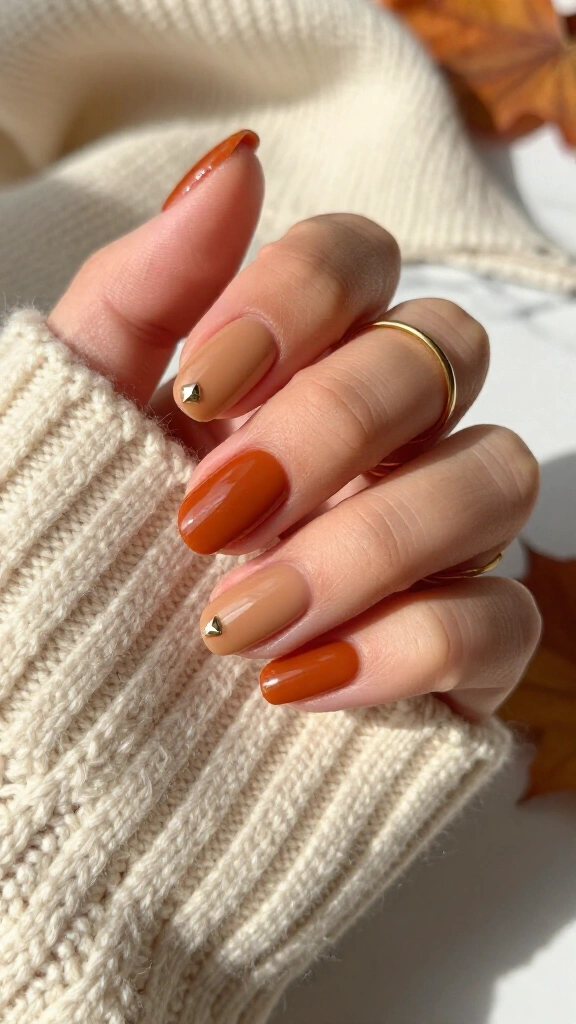
Toasted caramel blends warm orange with rich tan. Apply two coats of caramel cream polish to each finger, then set a tiny one-millimeter gold pyramid stud at the base of each cuticle. The small metal studs give solid polish the look of fine jewelry.
Nail artists writing for Byrdie explain that small metal studs add clean structure to solid manicures.
17. Sheer Peach Fizz with Floating Celestial Stars

A sheer peach base with fine shimmer creates a light, clean look. Paint a coat of sparkling peach jelly over your nails, then add tiny black crescent moons and small stars near the tips using a fine brush. Seal the art with a thick clear gel top coat.
This light palette pairs cleanly with gold rings and knit sweaters while keeping the holiday theme quiet.
How to keep your orange manicure looking salon fresh
Good prep and basic maintenance keep home manicures looking sharp for weeks:
- Hydrate your cuticles daily: Dry skin around your nails distracts from clean art. Rub jojoba oil into your cuticle line every evening.
- Seal your free edges: Orange polish chips quickly along unsealed tips. Brush your top coat over the front edge of each nail to lock in the color.
- Select warm undertones: If neon orange clashes with your skin tone, switch to terracotta, rust, or cider shades for a softer match.
Polished Halloween nails come down to simple shapes, thoughtful color choices, and steady prep work. Choose a design that fits your style, gather your brushes, and paint your October set.