You do not need surgeon-steady hands to paint festive holiday nail art. Many of us see hyper-detailed botanical tutorials online and assume the process requires tiny specialty brushes and fine art training. The real secret is simple: holly nail art forgives mistakes easily. Two dark green dots dragged outward turn into leaves, and three bright red dots make your berries. The whole technique takes seconds.
Holly accents turn a basic red coat into salon-quality art, whether you prefer clean minimalism or intense holiday sparkle. Grab a dotting tool (or a simple bobby pin) and try these 14 holiday holly designs that look sophisticated without demanding hours at your desk.
1. Minimalist sheer nude with micro holly
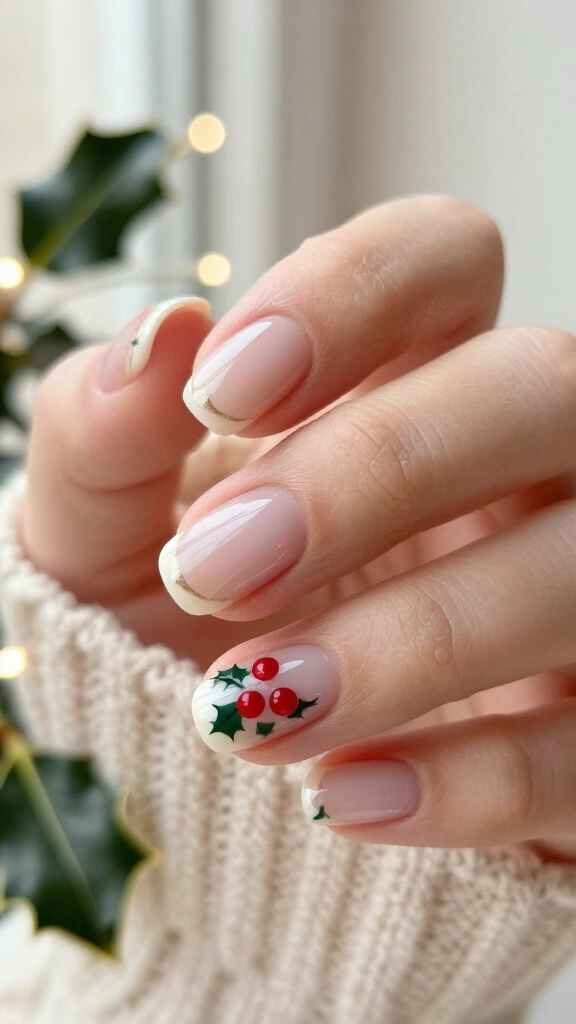
This delicate look pairs a bare nail aesthetic with holiday cheer. Start with a sheer jelly base like Essie’s “Mademoiselle” or a milky pink tone. Dot three tiny red berries near the edge of your nail bed, then add two pointed green leaves.
Negative space keeps the style neat and workplace-friendly. Painting just one or two accent nails saves time and looks sharper than a crowded ten-finger set. Top the work with a glossy clear coat to protect your handiwork.
2. Velvety emerald French tips with holly clusters
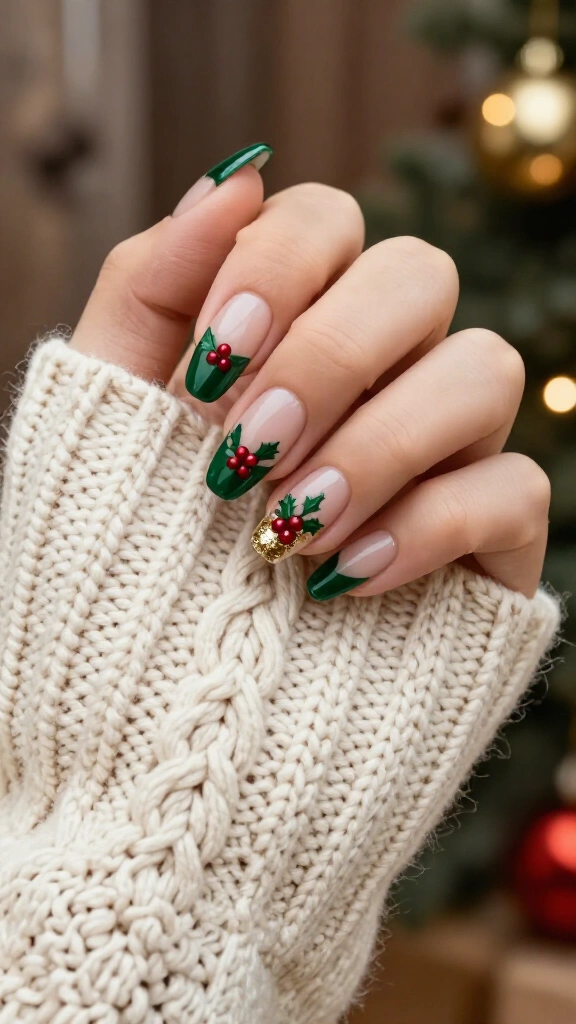
Swap classic white tips for deep forest green. Paint traditional French curves on almond or oval nails, then paint a small holly sprig right where the green edge meets the bare nail. You can browse more seasonal tip designs in these French tip Christmas nail ideas to find other winter variations.
A deep green tone gives the design rich depth. Place a fleck of gold glitter in the middle of each berry cluster to add subtle holiday shine. This set coordinates well with heavy winter coats and wool sweaters.
Pro tip for perfect leaves
Place two drops of green lacquer next to each other, then pull a toothpick through the middle toward the outer edge. You form a pointed leaf in five seconds flat.
3. Frosted pearlescent glaze with holly berries
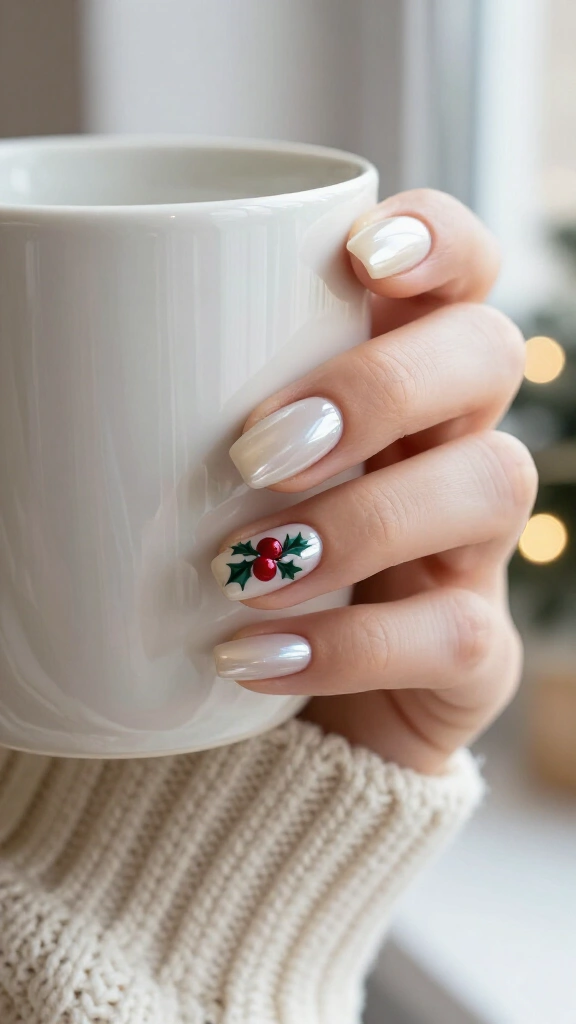
Glazed nails remain a cold-weather favorite. Buff white pearlescent chrome powder over a vanilla base coat to build an icy shine. Paint bold red holly berries directly in the center of your accent nails.
The contrast between the frost finish and the deep red berries stands out cleanly. Editors at Allure frequently point to chrome bases as a quick way to modernize holiday manicures. You achieve a polished winter finish without painting dozens of tiny details.
4. Milky white base with gold foil and holly
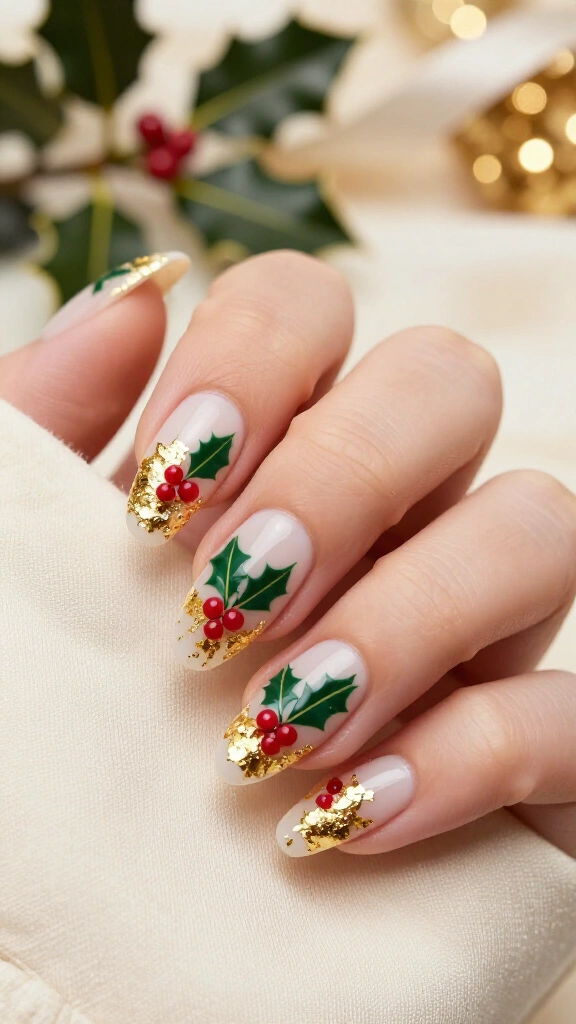
A milky white base lets deep holiday shades pop. Brush on two coats of semi-sheer white polish, press shredded gold foil flakes across the tips, and place your green holly leaves directly over the gold.
The gold foil hides uneven edges, making this layout great for novices. Gold foil distracts the eye so nobody notices minor painting slips.
5. Matte cranberry accent nail with green ivy vines
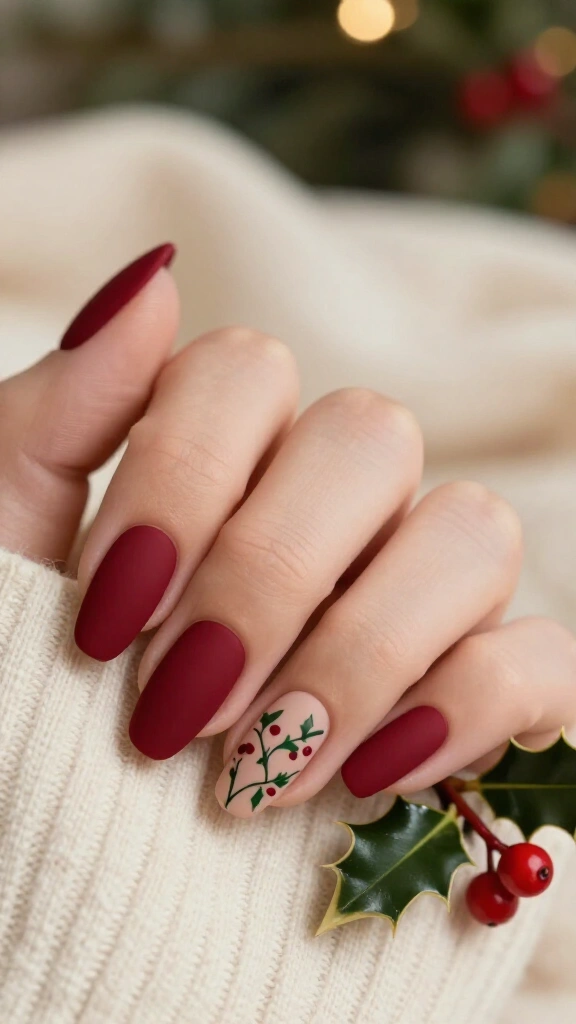
Matte top coats change the feel of traditional holiday red. Coat four nails in dark cranberry red, saving your ring finger for a neutral nude polish. Paint thin holly vines across that single accent nail, then seal every nail with a flat matte coat.
Matte top coats soften crisp lines and blur slight brush marks. The muted finish looks intentional and neat without complicated techniques.
6. Rose gold chrome with dainty holly corner accents
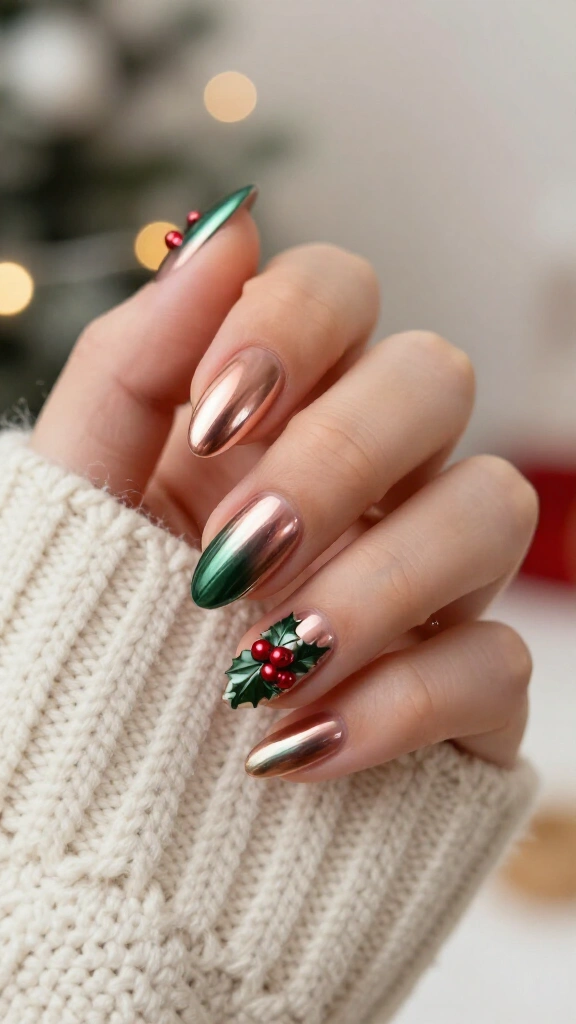
Holiday greenery pairs well with pink metallics. Rose gold chrome creates a warm shine that flatters warm undertones. Paint two pine-green leaves and three metallic red berries across the lower corners of your thumb and ring finger.
Keep your botanical details small so you do not crowd the mirror finish. The metallic base carries most of the visual weight, leaving little work for your brush.
7. Negative space half-moon holly cuticles
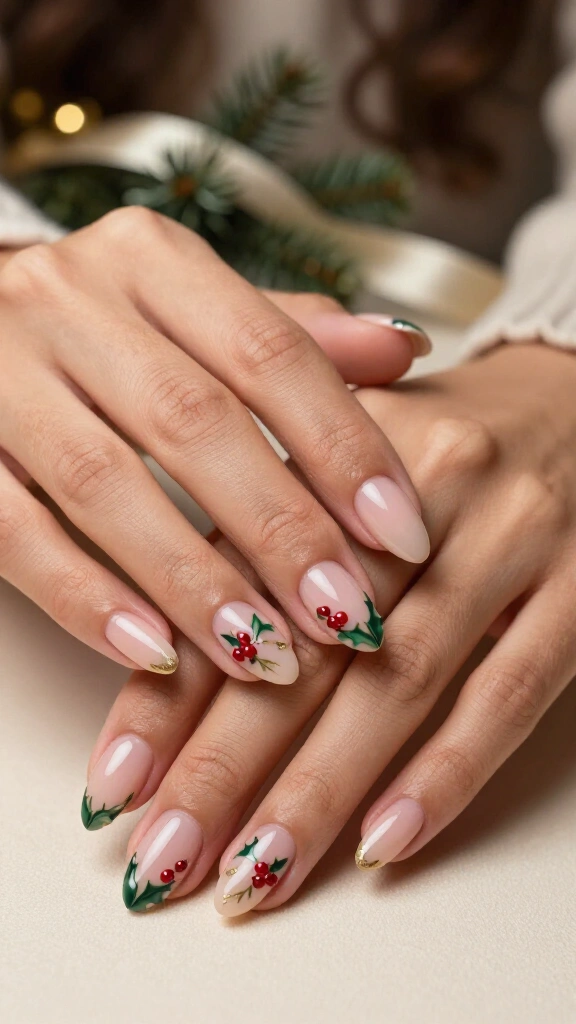
Flip conventional nail art by placing your artwork along the lunula, the pale half-moon at your cuticle. Apply a sheer builder gel base (consider long-lasting Christmas BIAB nails to keep nails strong through the new year) and line your holly berries along the cuticle curve.
Because the cuticle area carries clear polish underneath the art, your nails grow out smoothly. You can wear this set for three to four weeks without noticeable gaps.
8. Plaid and tartan flannel with holly sprigs
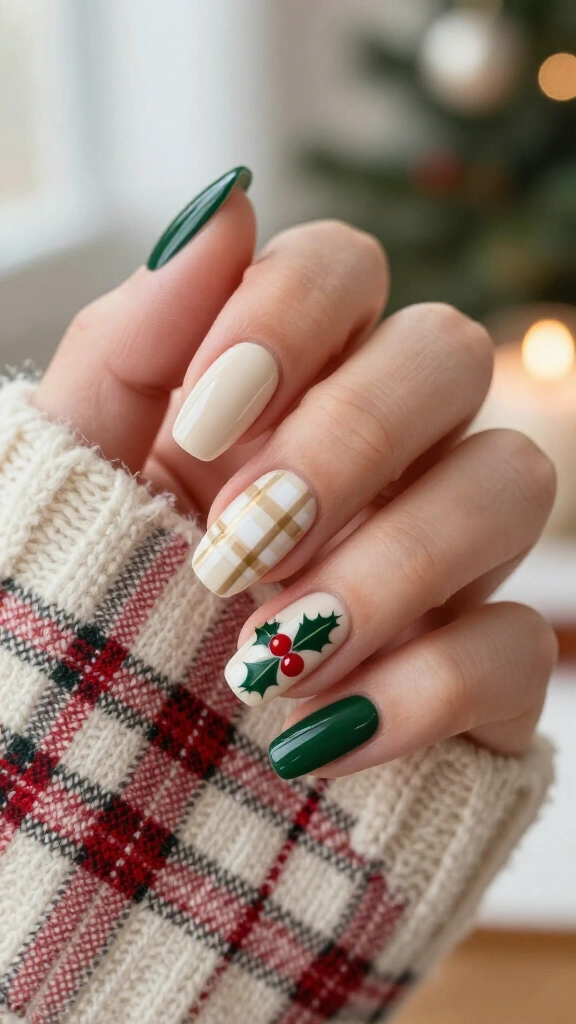
Flannel patterns bring immediate winter comfort to your hands. Paint beige and white tartan stripes across your middle fingernail, then add a small holly branch on your ring finger. The straight plaid lines balance the rounded shape of the berries and leaves.
Use striping tape to pull crisp tartan lines without relying on freehand brush control. Drop your holly leaves right where the grid lines cross to finish the design.
9. Classic red glitter French with winter berry leaves
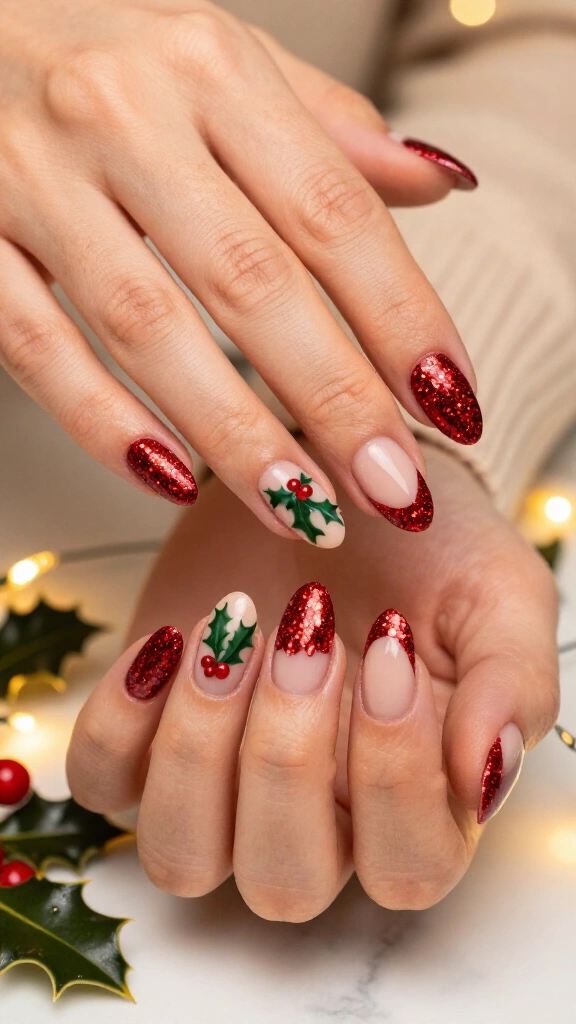
Red glitter tips look cheerful on their own, but green sprigs at the base tie the holiday theme together. While some people experiment with wide shapes like Christmas duck nails, traditional almond nails keep botanical art neat and balanced.
Apply chunky red glitter polish across the tip of each nail. The glitter picks up room lighting, while solid green leaves ground the design.
10. Soft champagne shimmer with mistletoe-style holly
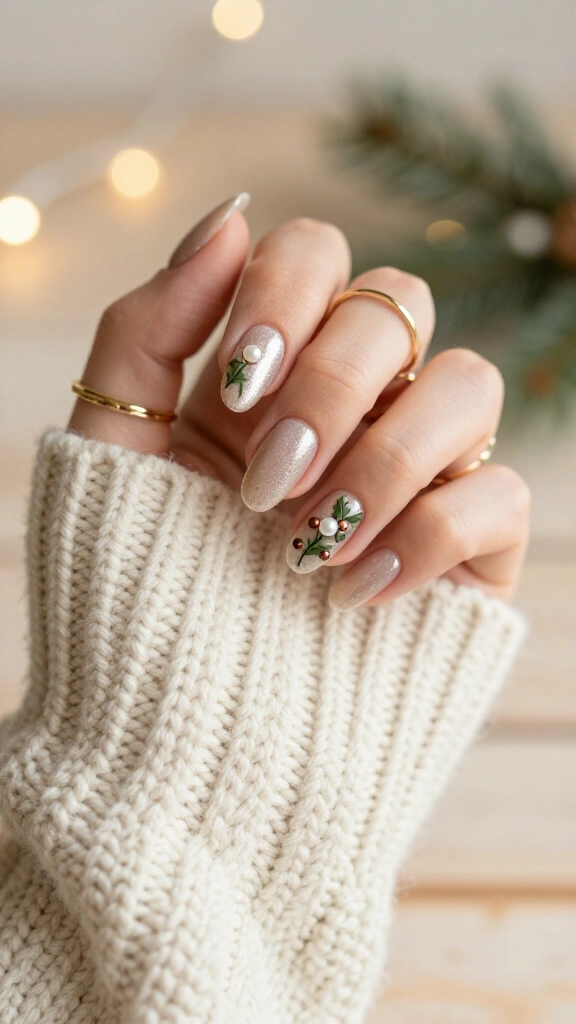
If fire-engine red feels too intense, swap it for champagne and olive tones. Brush olive-green polish onto your leaves and place copper dots or miniature pearl beads in place of red berries, setting them over a shimmering champagne base coat.
This subdued palette pairs naturally with neutral knits and simple gold rings. It offers a subtle take on holiday styling.
11. Forest green ombré with 3D gel berries
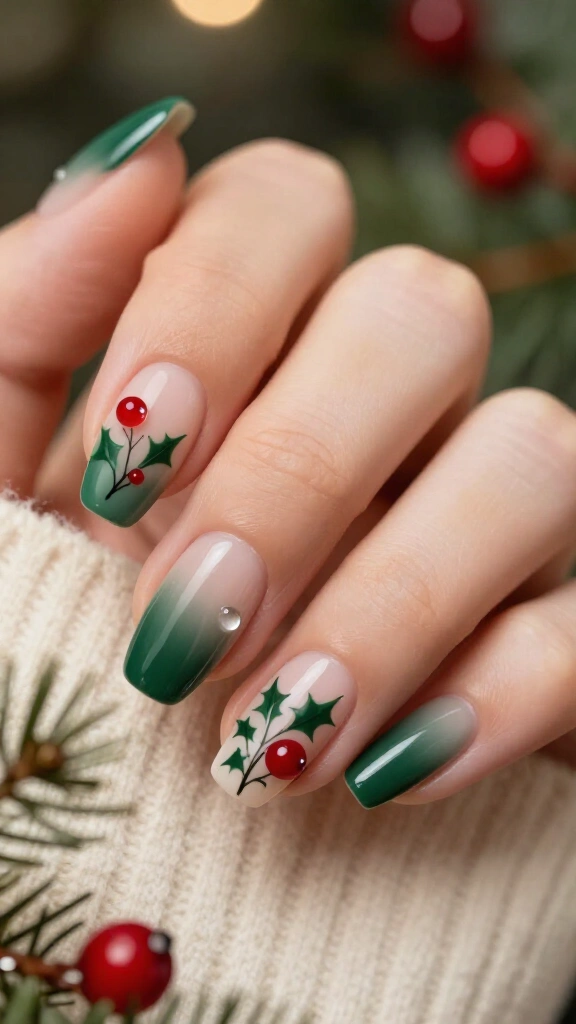
Three-dimensional gel adds physical texture to simple nail art. Sponge deep forest green polish from the free edge downward into a neutral nude base. Paint your holly sprigs flat, then place a round drop of clear builder gel or gem glue over every red berry.
Salon trend reports from Byrdie show high demand for tactile 3D elements this winter. The cured clear drops resemble rounded ice droplets over winter berries.
12. Sweater weather knit texture with holly embellishments
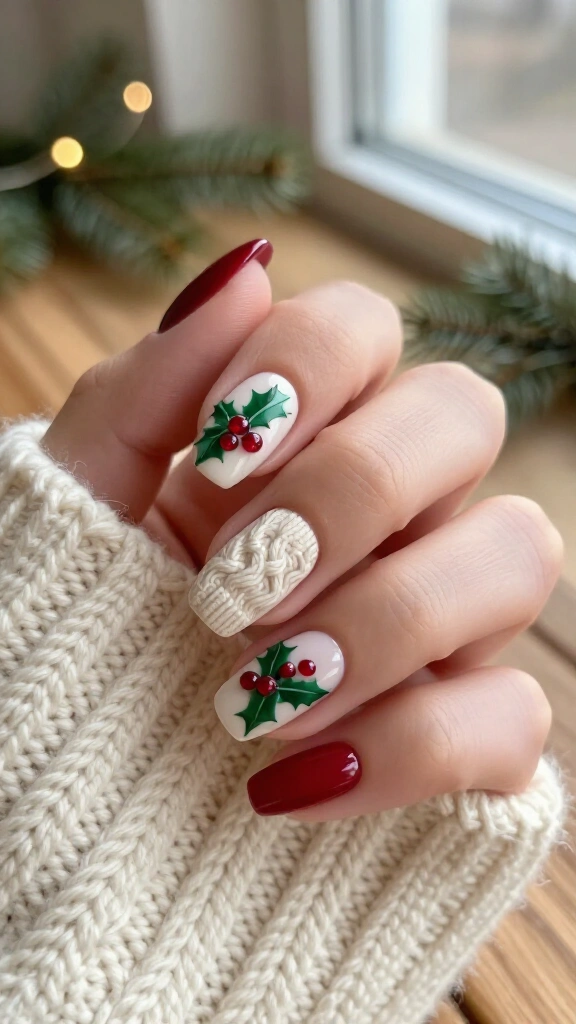
Cable-knit nail art brings the look of winter sweaters to your manicure. Draw raised cable lines using thick gel paint, dust clear acrylic powder over the wet lines, and cure the design under your lamp. On the next nail, paint a crisp holly sprig over a creamy ivory background.
The matte cable texture plays off the glossy leaves and berries. This combination gives your hands depth without needing complicated color blends.
13. Black licorice base with metallic holly leaves
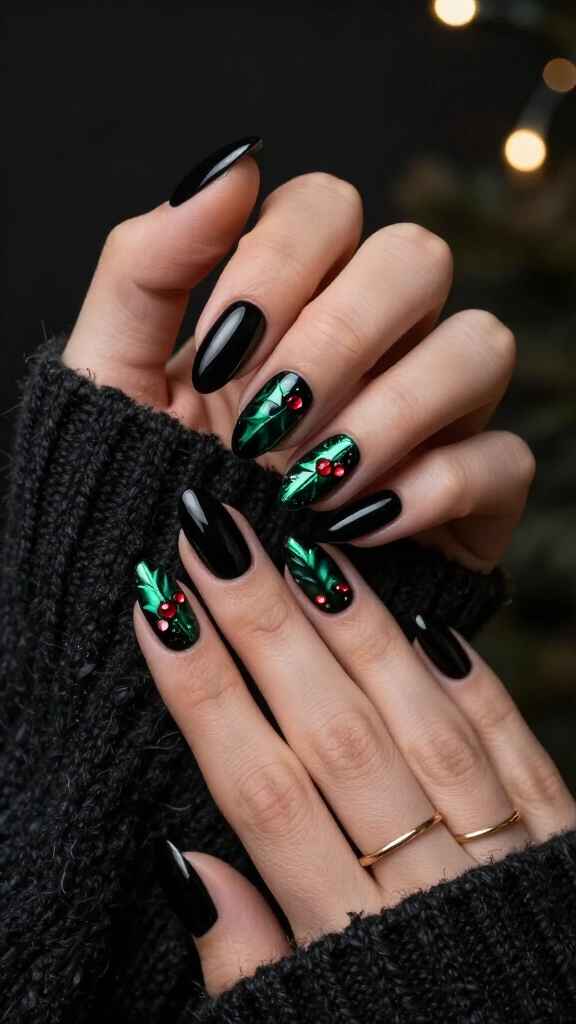
If you prefer dark tones, use jet-black lacquer as your canvas. Paint holly foliage with metallic emerald polish and press red rhinestones into place for the berries. The deep base makes both colors stand out sharply.
This moody palette gives you a distinct alternative to standard crimson sets. It looks clean, modern, and slightly unconventional.
14. Holographic snowflake sky with holly berry accents
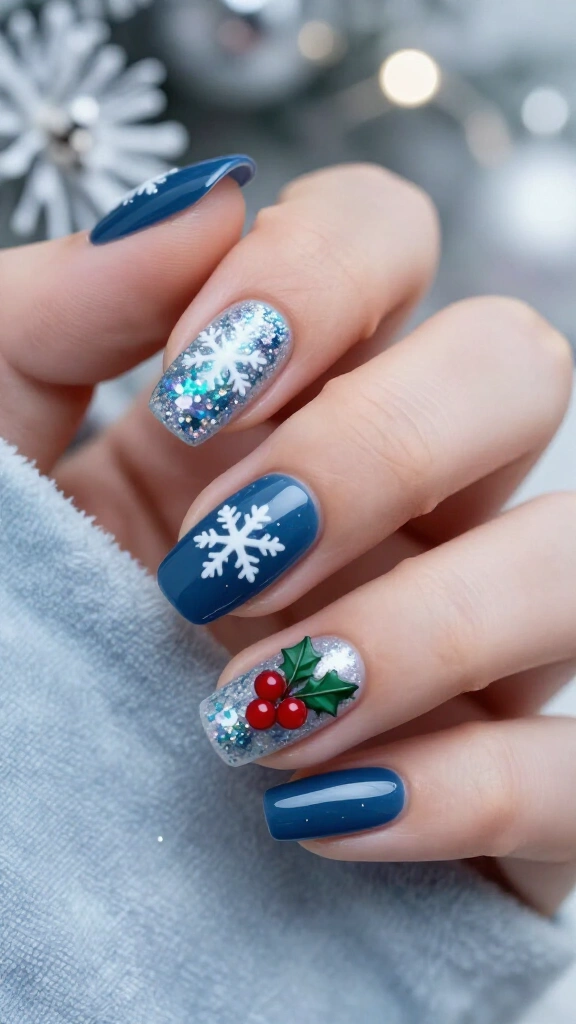
Set a winter night backdrop on your nails with deep color and glitter. Apply sheer holographic glitter over a slate-blue or dark navy base coat. Paint simple white snowflakes on two nails, then add a small holly cluster to your ring finger.
The holographic flecks catch the light, while the red berries anchor the cool blue base. This layout brings seasonal details together without looking cluttered.
Mastering holly nails at home: quick cheat sheet
- Leaf shape: Place two drops of green lacquer next to each other, then drag a toothpick outward to make sharp points.
- Berry circles: Dip the rounded end of a bobby pin into red polish to stamp clean circles every time.
- Cuticle care: Hydrate your skin with oil before you paint. The American Academy of Dermatology advises against cutting cuticles so you avoid winter infections and keep nail beds intact.
Wrapping it up: festive botanicals made simple
Holiday manicures do not require expensive salon visits or hours of precision work. Once you learn how to pull a green dot into a leaf and stamp three red circles, you can complete these designs at your kitchen table. Choose your favorite look from this list, grab your supplies, and create a crisp holiday manicure at home.