Skip the basic pumpkin stickers and plain orange polish this season. Real horror fans want manicures that resemble practical special effects from an eighties cult classic. Whether you watch retro slasher flicks or psychological thrillers, your nails deserve something bold and bloody.
You can turn your fingertips into miniature scenes of cinematic horror. Here are 19 horror nails Halloween manicures featuring thick blood drips, distressed textures, and classic slasher motifs. Grab your gel kit and pick your next set.
1. Ghostface Matte Black & Blood Drip
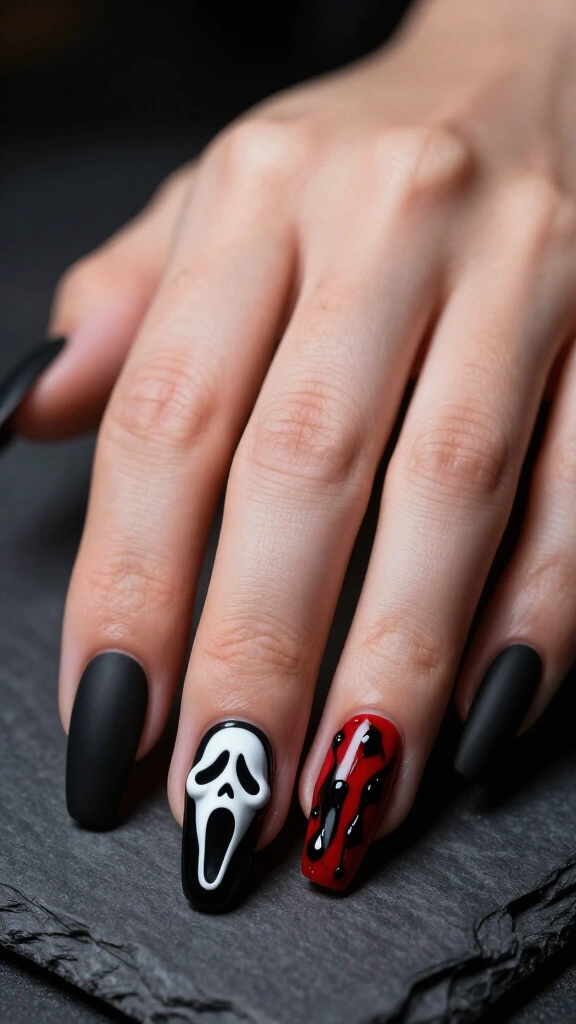
The elongated Ghostface mask anchors this classic slasher look. A hand-painted mask over a chalky matte black base immediately draws attention. Pair that matte background with 3D glossy gel blood drips across the surrounding fingers to create a sharp contrast in texture.
For realistic blood, mix one drop of black gel into a pool of deep crimson polish before forming your drops. That darker center creates the appearance of thick, coagulated stage blood.
2. Freddy Krueger Distressed Sweater Stripes & Razor Slits
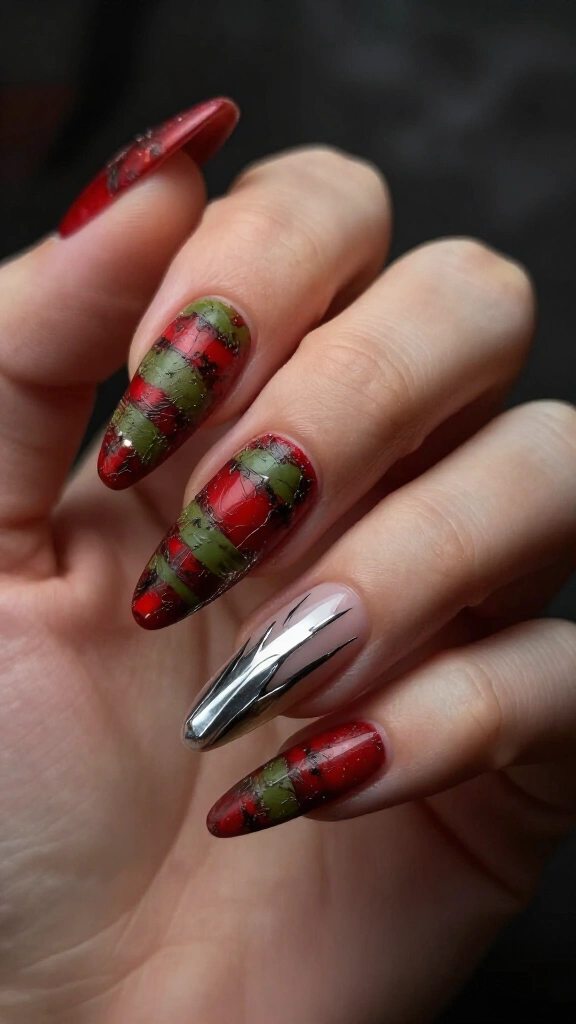
Recreate Freddy’s dirty sweater pattern using alternating stripes of olive green and burnt red. Drag a dry brush across wet lacquer to give the stripes a rough, weathered fabric texture.
Paint metallic silver chrome slash marks over a bare nude base on your accent finger. These thin, reflective lines suggest the bladed glove without cluttering the hand.
3. Jason Voorhees Hockey Mask Splatter
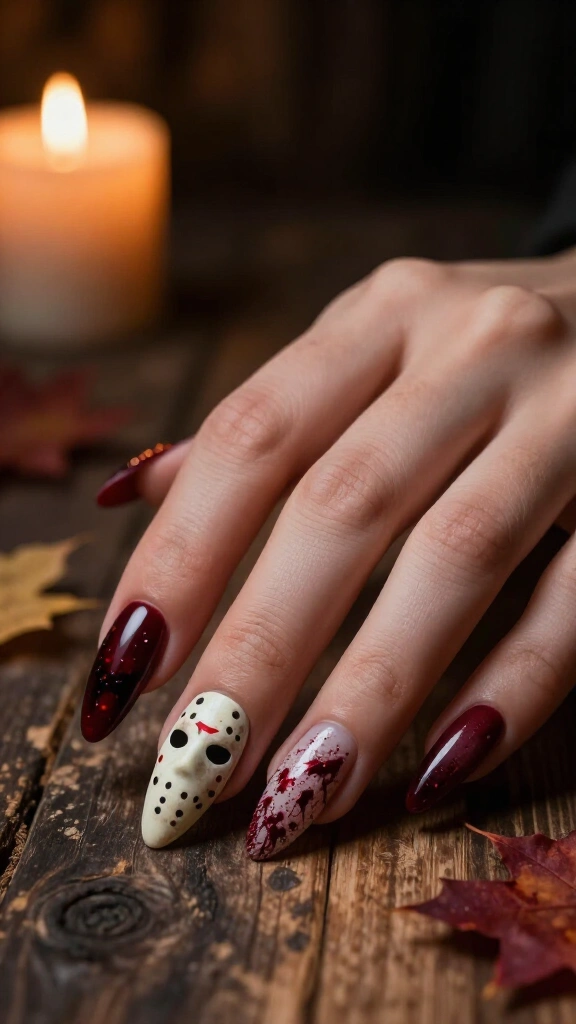
Build a Camp Crystal Lake tribute by painting an off-white hockey mask with tiny black dots for the air holes and faded red chevrons on the forehead. A matte finish gives the mask an aged, dirty appearance.
Flick dark red polish across the surrounding nails with a stiff fan brush or blow polish through a straw for a scattered spatter pattern. If you prefer deeper base colors, look through these burgundy fall nails for more ideas.
4. Michael Myers Bloody Stiletto Daggers
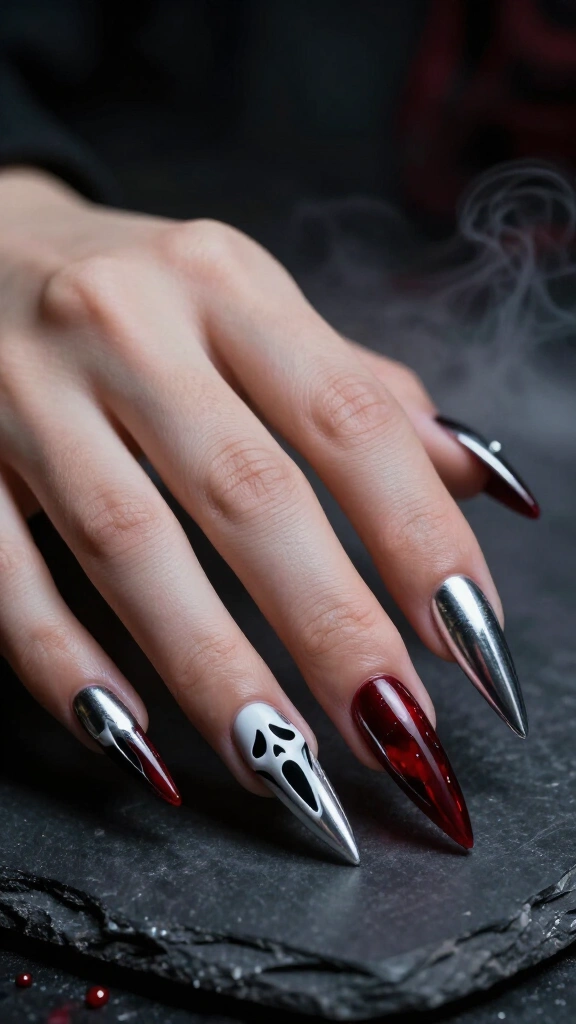
Shape your nails into sharp stiletto points to resemble butcher knife blades. Rub silver chrome powder over the entire set, then cap the tips in sheer, syrup-like red polish.
Paint a simple white Myers mask silhouette on your thumb to anchor the theme. This set merges crisp metal finishes with raw horror imagery.
5. Chucky Good Guy Stitches & Denim Textures
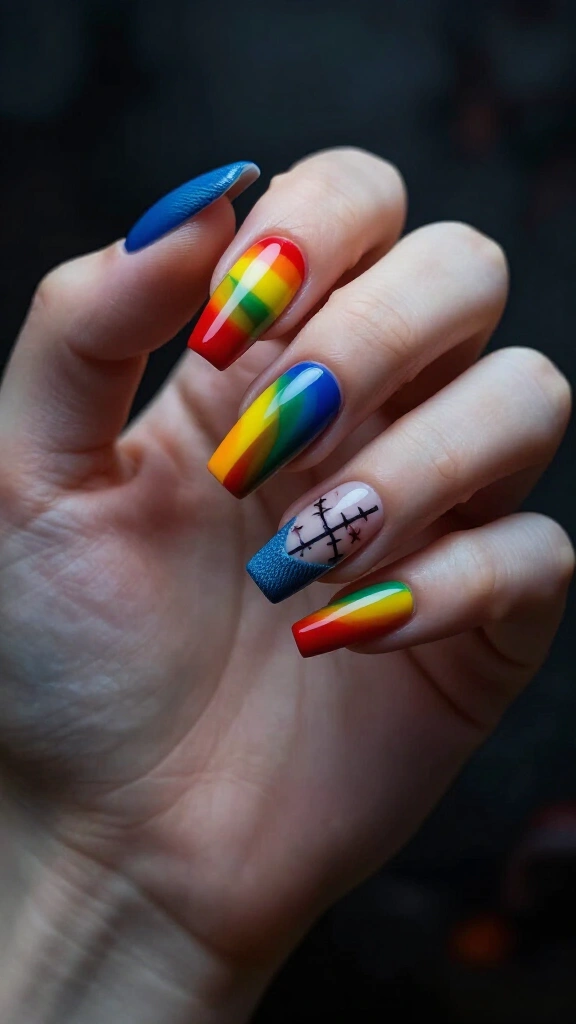
Pay tribute to the possessed doll by painting bright rainbow sweater stripes across two fingers. On the remaining nails, use a thin detail brush to paint black surgical stitches over a pale skin-toned base.
Apply a textured blue polish with a matte top coat to match Chucky’s denim overalls. The contrast between bright primary colors and grotesque stitches creates a disturbing look.
6. Pennywise Grinning Smile & 3D Red Balloon
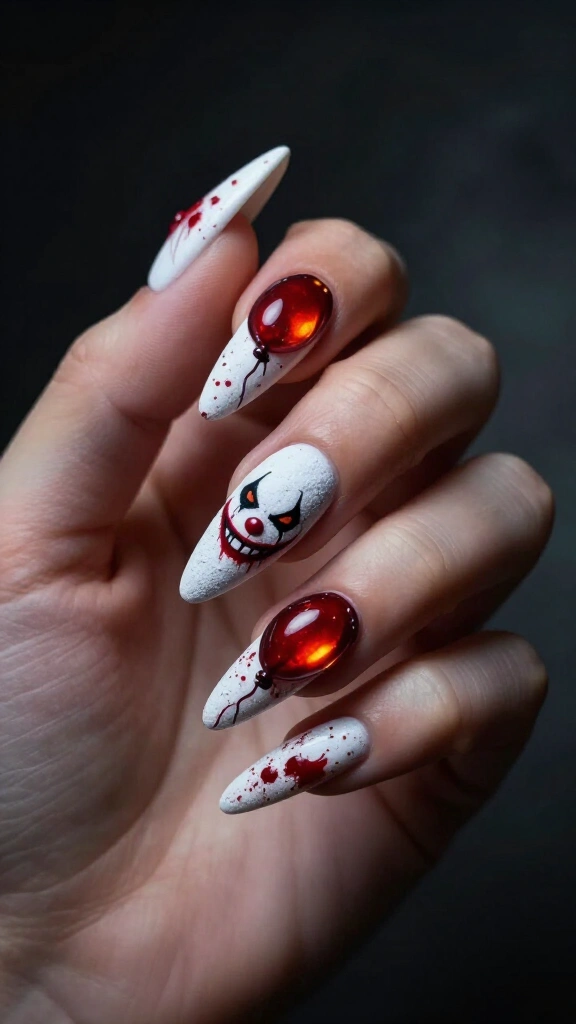
Start with a flat chalk-white base and paint Pennywise’s smeared red mouth and orange eyes across the center nail. The crooked clown smile commands attention immediately.
Sculpt a glossy red balloon on another nail using a thick drop of builder gel. The high-shine balloon pops sharply against the flat, powdery background.
7. Texas Chainsaw Distressed Leather & Industrial Rust
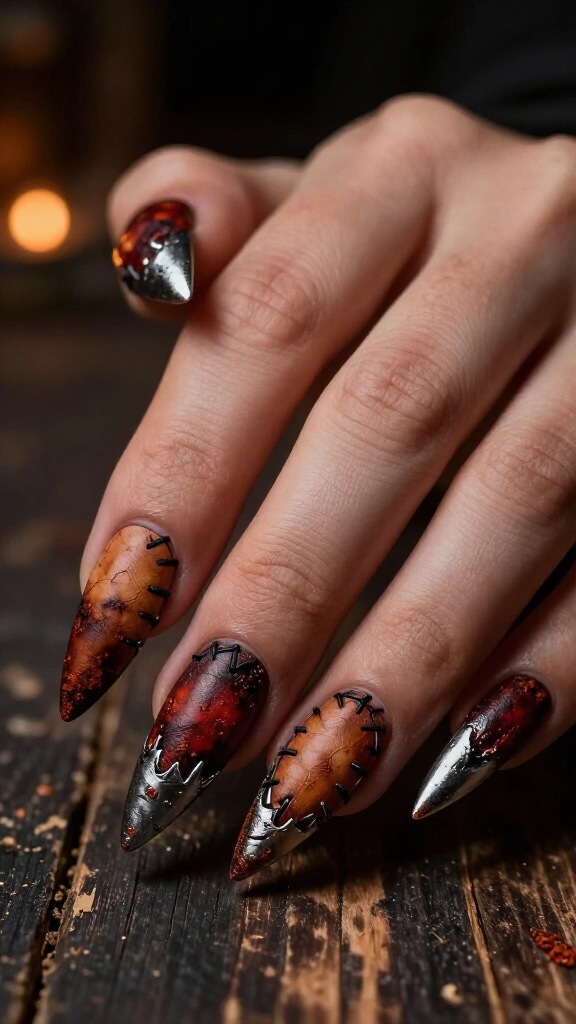
Dab shades of tan and dark brown onto the nail with a makeup sponge, then seal them under a matte top coat to create the look of dried leather. Paint crude black stitches along the outer edges of each nail.
Press gunmetal foil and reddish-brown pigment onto the tips to suggest rusted metal saw teeth. Articles in Allure point to tactile, dirty textures as the secret behind effective horror nail sets.
8. The Shining Overlook Carpet & “REDRUM” Lettering
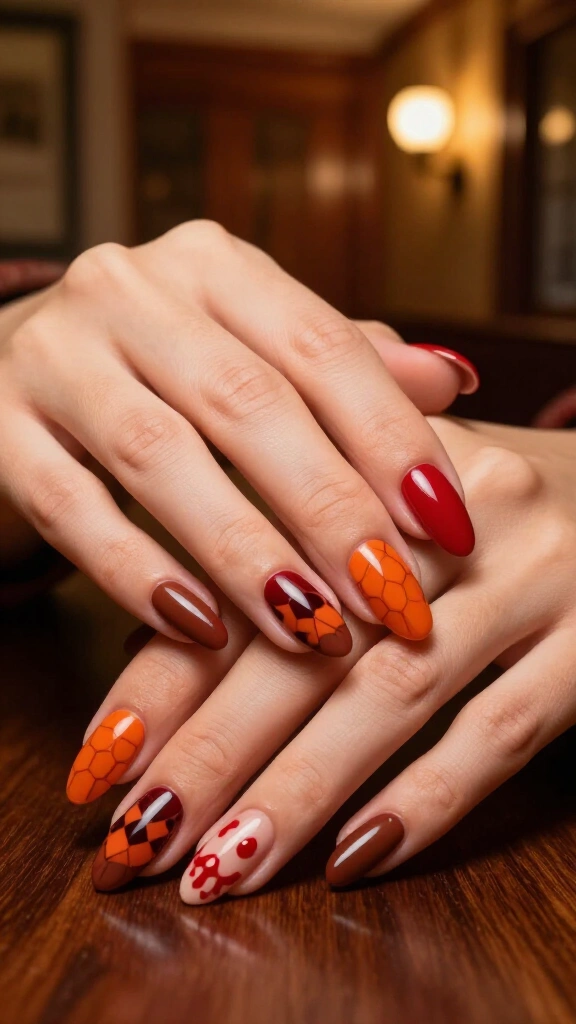
Paint the geometric orange, red, and brown hexagon pattern from the Overlook Hotel hallways across three accent nails. This seventies color scheme fits right into the fall season.
Write the reversed word “REDRUM” in dripping red paint across your index and middle fingers. If you want more seasonal color ideas, look through these Halloween nail colors.
9. Scream Queen Dripping Chrome Blades
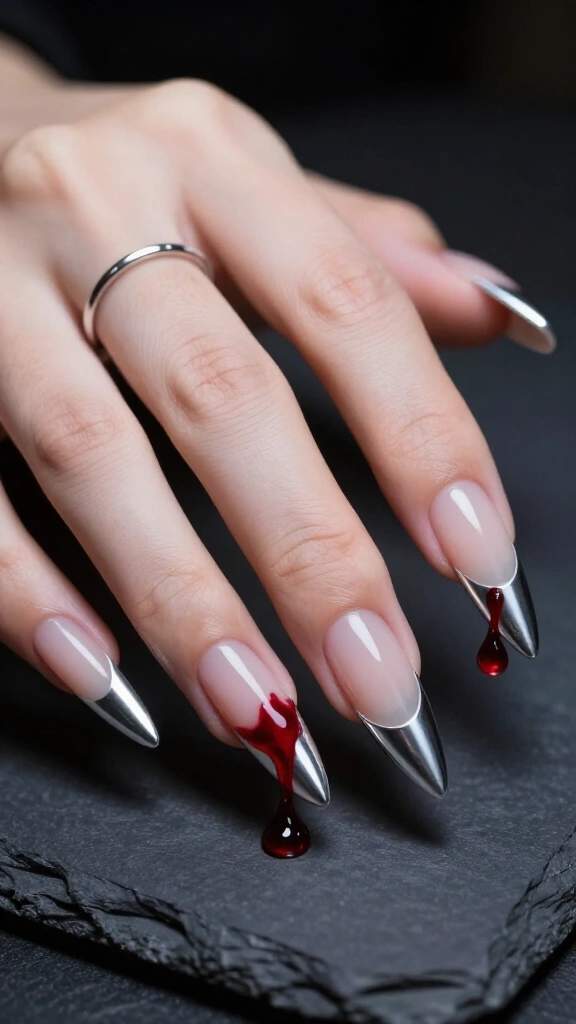
Turn regular French tips into razor blades by painting pointed silver chrome angles across clear or nude extensions. The mirror-finish chrome gives the tips a clean, metallic edge.
Place a thick, rounded drop of red builder gel at the lowest point of the chrome tip so it looks like fresh blood gathering on a blade. This style works well if you want a clean, striking design without heavy character art.
10. Carrie Prom Night Blood Bath Nails
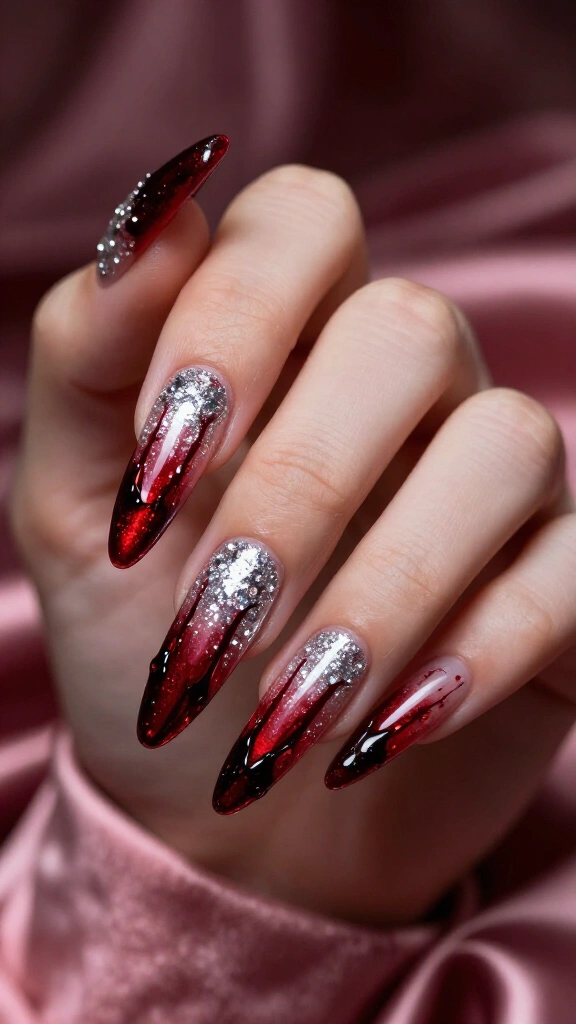
Build a vertical gradient starting with fine silver tiara glitter near the cuticles, then blend it into deep crimson at the free edge. Drag the dark red polish downward in thick streaks to imitate the bucket drop from the film.
The silver sparkle showing through the blood-red base keeps the design striking while delivering the gory theme.
11. Jigsaw Spiral Cheeks & Monochrome Puzzle Pieces
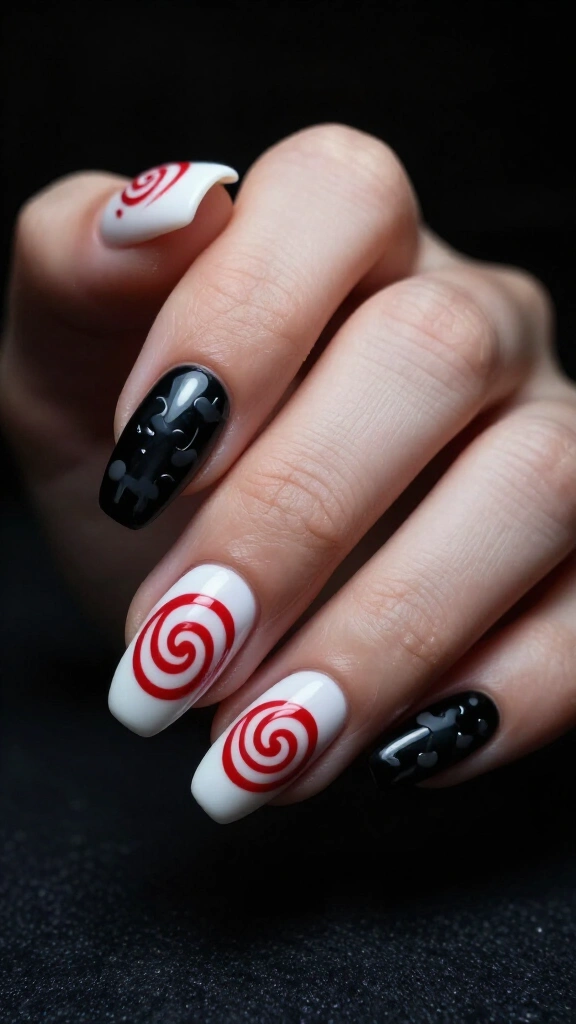
Paint your nails solid white, then draw Billy the Puppet’s red cheek spirals on two accent fingers using a thin striping brush. Keep the circular lines tight and clean.
Coat the other nails in matte black polish and stamp glossy black puzzle shapes over them. The black, white, and red palette gives this set an unmistakable horror look.
12. Hellraiser Cenobite Grid & Metallic Piercings
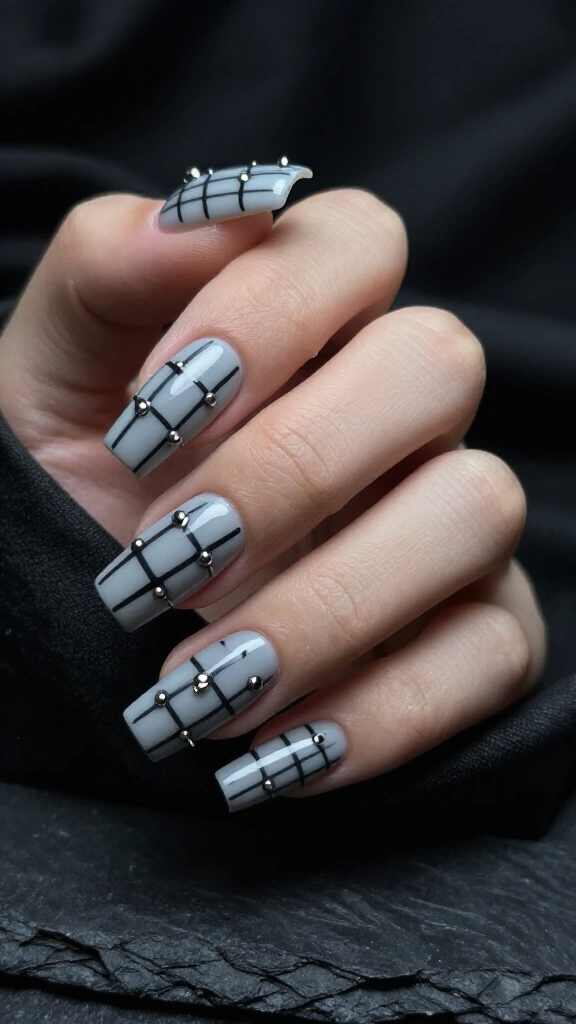
Lay down a pale gray base and paint a square grid across each nail with thin black lines. The pattern recreates the sliced skin from Pinhead’s face.
Glue tiny silver metal studs at every line intersection to mimic the pins. Writers on Byrdie cover how nail piercings and metal studs bring industrial style into modern nail sets.
13. Beetlejuice Sandworm Stripes & Toxic Slime
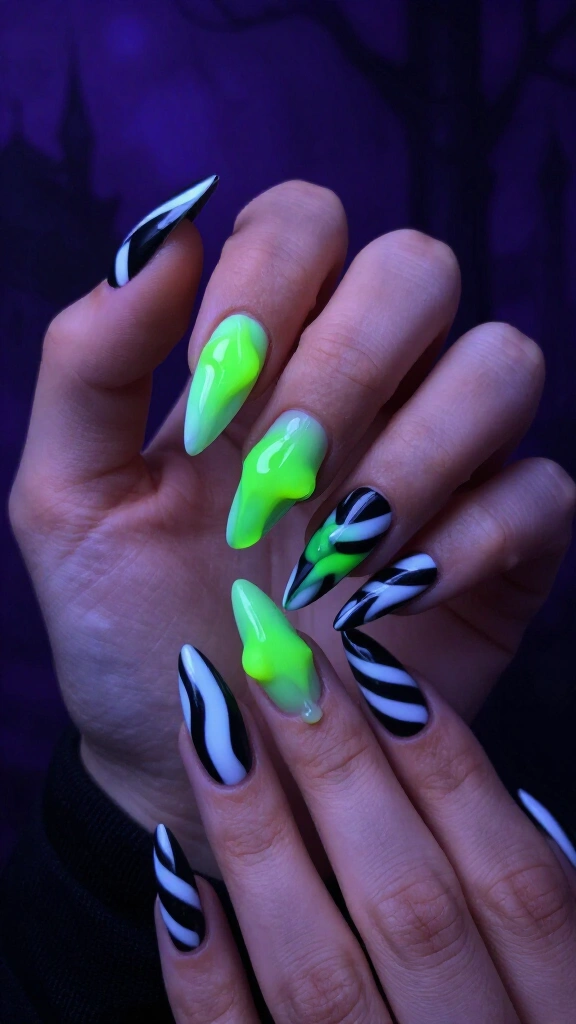
Paint diagonal black and white stripes across the nails to mirror the Sandworm body from Tim Burton’s classic film. Keep the tape lines clean for high contrast.
Add droplets of neon green builder gel near the cuticles so they look like dripping slime. Using glow-in-the-dark gel makes the green ooze shine under blacklight.
14. Vampire Bite Punctures & Velvet Ombré
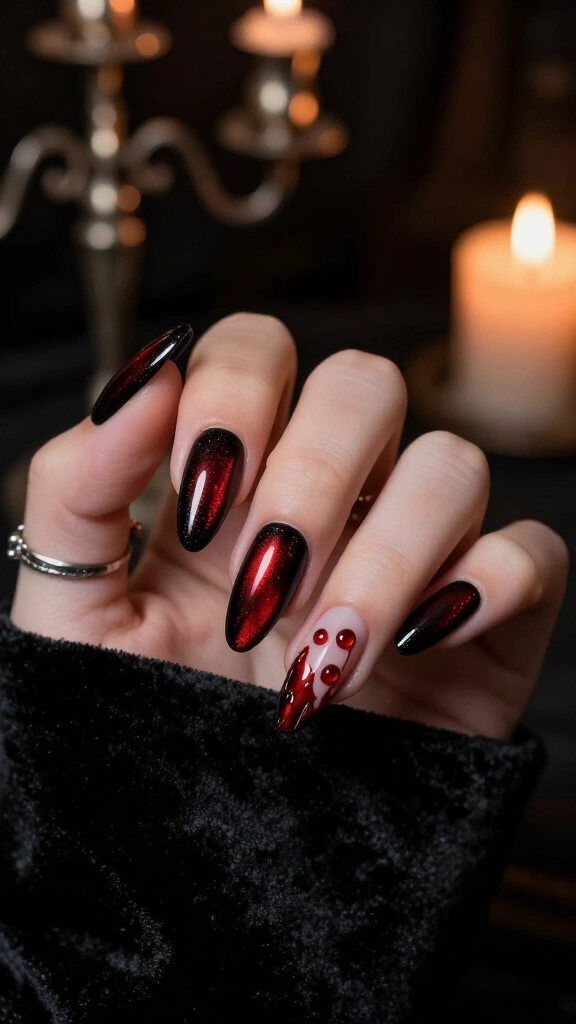
Use a magnetic red cat-eye polish over a black base to create a deep velvet sheen across your nails. Move the magnet to pull the shimmer toward the center of each nail.
Place two raised red gel dots on one accent nail and draw thin red lines down to the tip to resemble puncture wounds. See these fall Halloween nails for more subtle, dark sets.
15. Forensic Crime Scene Spatter & Evidence Markers
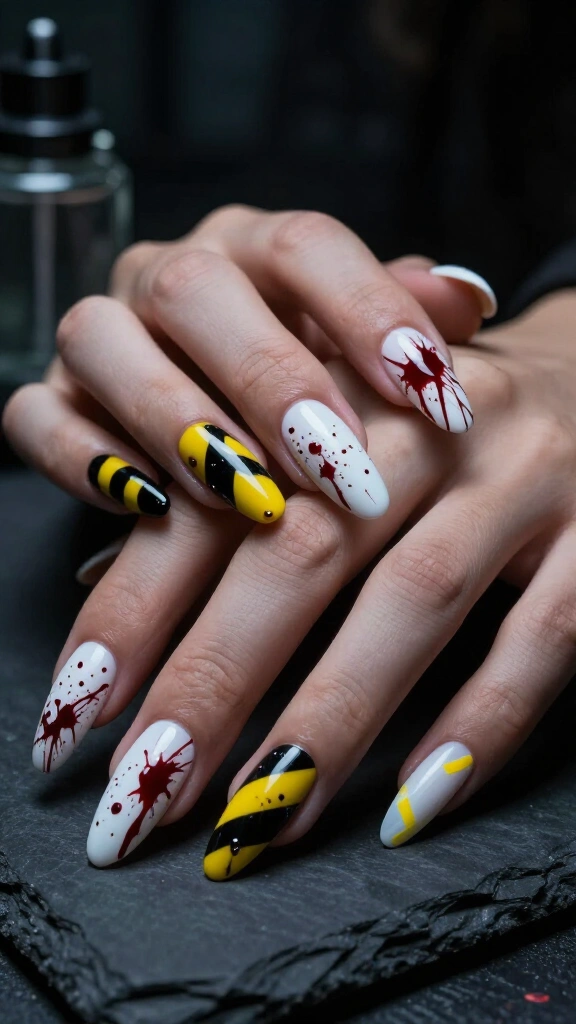
Paint your nails stark white and add fine blood spatter using a dotting tool and thin detail brush. Vary the size of the dots and flick the tails outward to copy realistic forensic patterns.
Add yellow caution tape diagonals across your thumbs and small black evidence numbers on your pinkies. This set turns the true-crime genre into sharp, recognizable nail art.
16. Realistic Stitched Wounds & Exposed Flesh
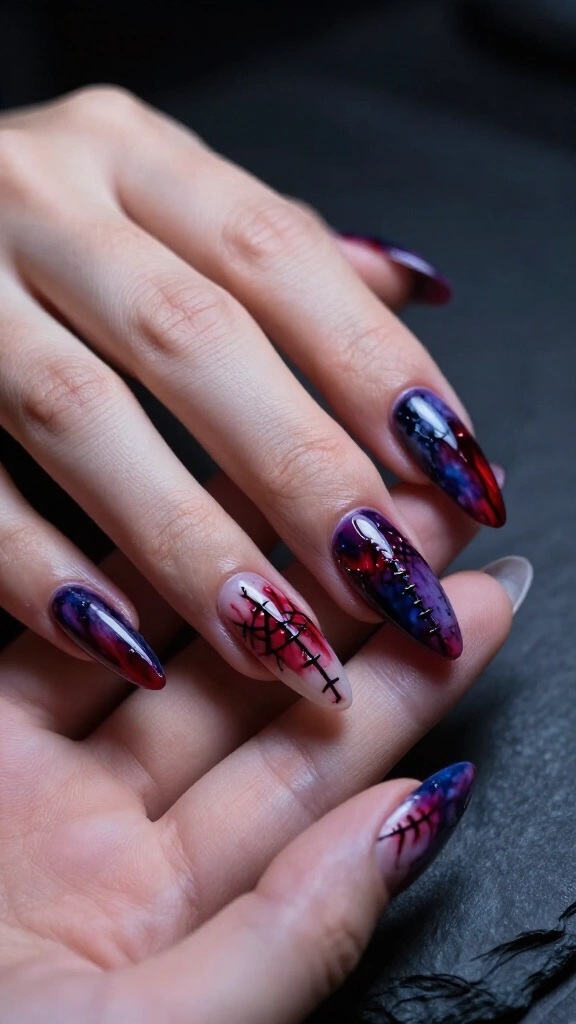
Build a raised ridge down the center of each nail with thick 3D modeling gel. Blend purple, blue, and raw red gel polish around the base of the ridge to mimic bruised, inflamed skin.
Lay fine black thread or paint thin cross-stitches over the ridge to create surgical sutures. The raised texture gives the design a convincing, lifelike appearance.
17. The Exorcist Possessed Green Ombré & Cracking Crosses
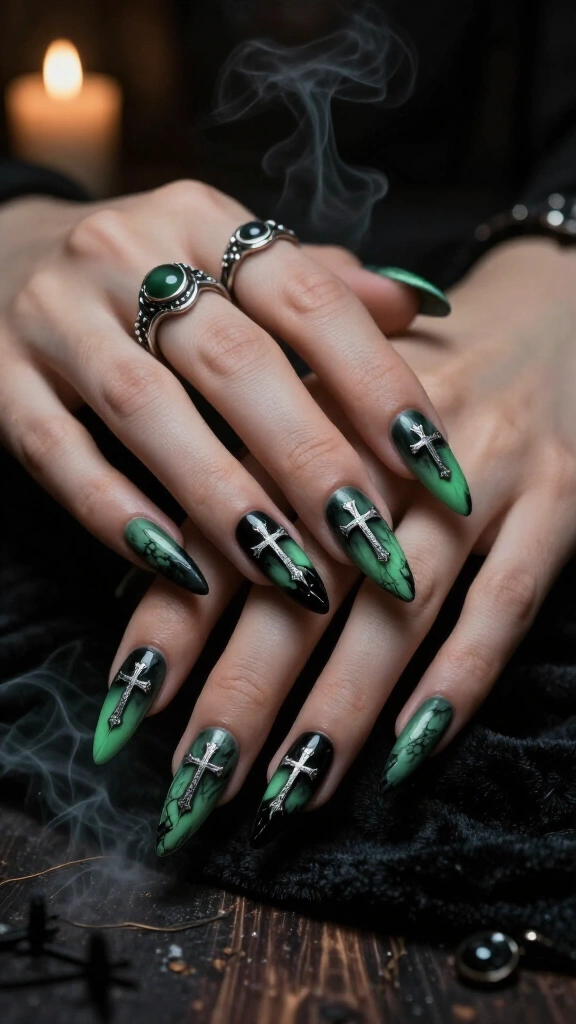
Apply a pea-green blooming gel over a dark charcoal base. The blooming gel disperses the green pigment outward, creating a smoky, cloud-like fade.
Stamp distressed upside-down crosses in antique silver chrome over the green smoke. The murky background colors give this set a genuinely eerie tone.
18. Candyman Honeycomb & Swarming Hornet Silhouettes
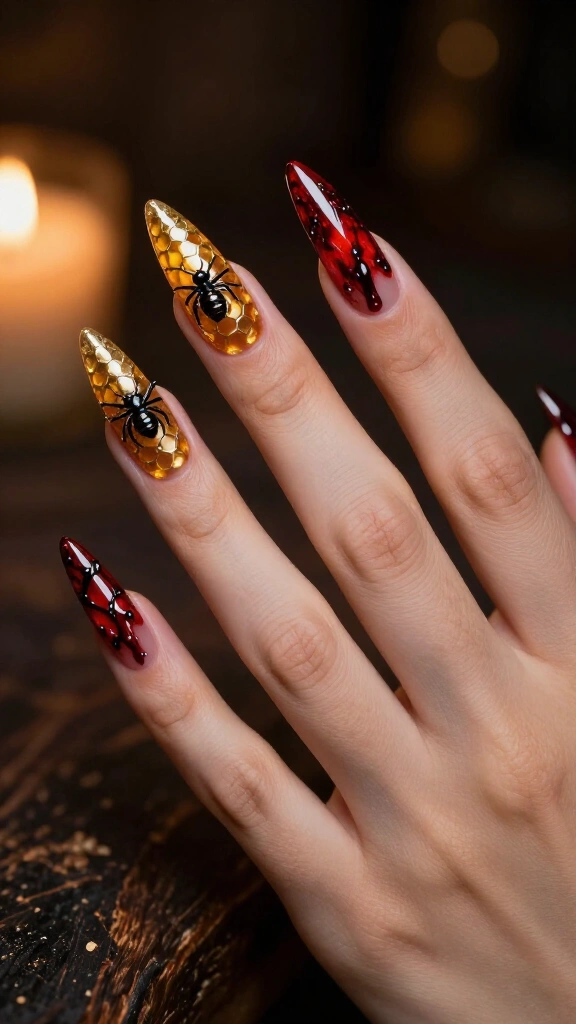
Layer amber jelly polish over the nail and draw a raised honeycomb pattern using clear builder gel and gold chrome powder. The translucent amber base lets light pass through like real honey.
Paint small black bees across the honeycombs and smudge dark crimson polish across the tips. The combination balances warm golden tones with sudden patches of red.
19. Found Footage VHS Glitch & Slasher Film Strips
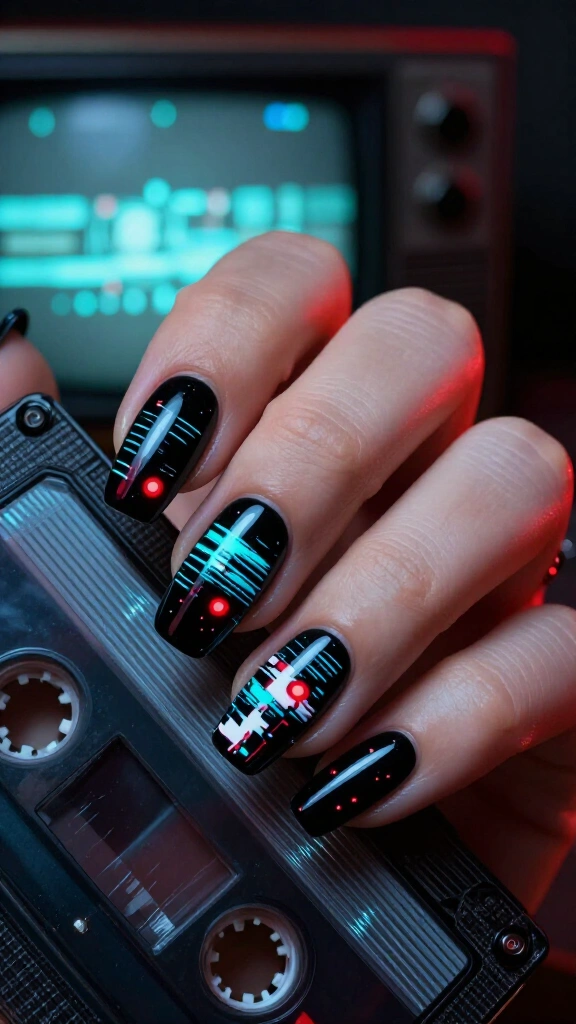
Paint a black base and add thin horizontal static lines in cyan, red, and white. Offset the lines slightly to mimic the chromatic aberration of a damaged video tape.
Stamp retro video words like “PLAY” or “REC” along with a red dot across your thumb and ring finger. This concept stands out from standard spooky patterns with its distinct tape distortion look.
Pro tips for long-lasting slasher nail art
Detailed nail art requires solid prep and the right curing habits so your set lasts through Halloween night without chipping. Follow these practical steps:
- Layer 3D gels in stages: Cure thick blood drops in thin passes under your UV or LED lamp so the core hardens fully without staying tacky.
- Seal chrome with rubber base: Paint a layer of clear rubber base coat directly over chrome powder before applying your top coat. Writers at Nailpro note that this prevents the chrome from flaking off at the free edge.
- Mix matte and gloss finishes: Put glossy gel drops directly over a chalky matte base to make the wet effects stand out immediately.
Final thoughts
Horror nails let you adapt iconic film monsters and practical gore effects into everyday manicures. Choose between simple bloody tips, detailed monster portraits, or textured wounds depending on how much time you have. Book an appointment with your nail artist or grab your own detail brushes to get your set ready for October.
